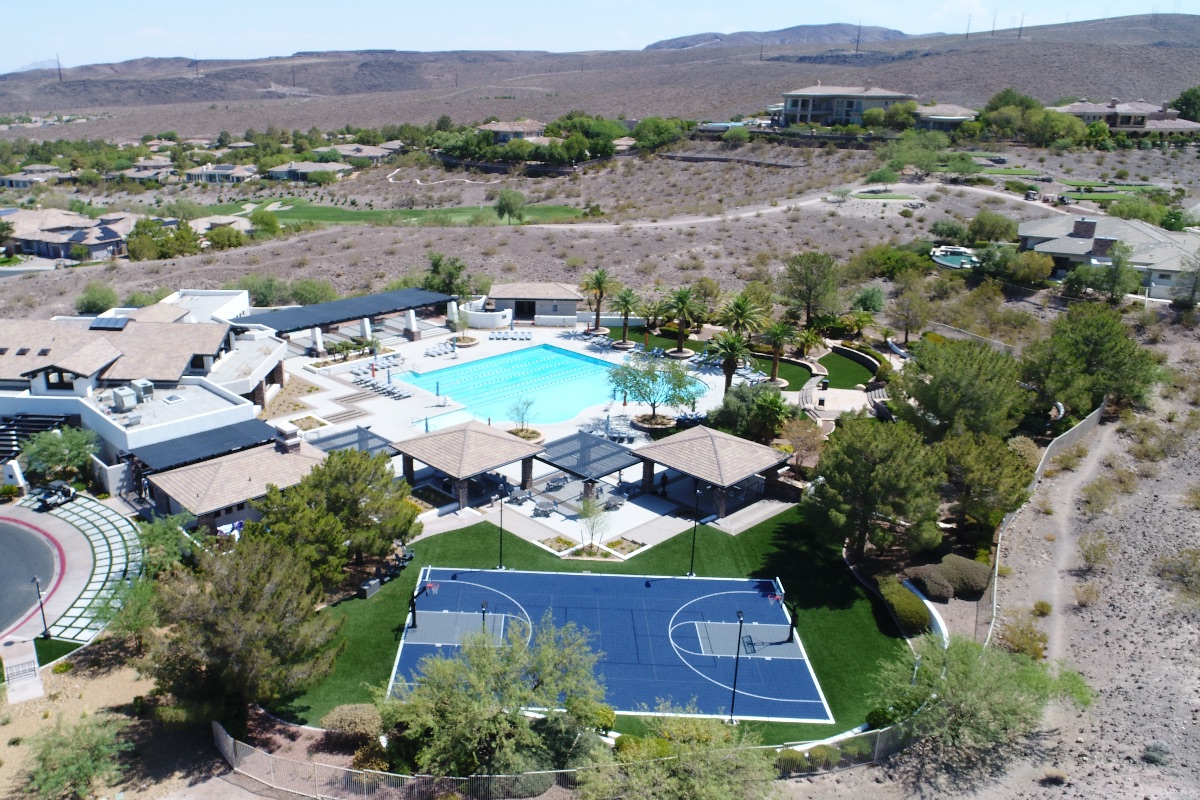
Permits and HOA Approval for a Backyard Court in Clark County

The backyard court permit question almost always arrives in the same shape. Someone has picked a spot, priced a build, and then a neighbor or a contractor says the word “permit” and the whole project stops for three weeks while nobody is sure who to call.

Here is the part most homeowners miss. There are two separate approvals, they come from two completely different kinds of authority, and neither one knows the other exists. You can satisfy one and still be blocked by the other.

What follows is the general path. It is not legal advice and it is not a substitute for your own jurisdiction. Requirements in unincorporated Clark County are not identical to those in the City of Las Vegas, Henderson, North Las Vegas or Boulder City, and codes get amended. Confirm every specific with your local building department and read your own recorded covenants before you commit to anything.

Two approvals, two different worlds

The first is the public one. A building department enforces adopted code. It cares about structural safety, electrical safety, drainage, grading, and whether what you built matches what was approved. Its authority comes from law, and its remedy for ignoring it is a stop-work order, a correction notice, or a problem that surfaces years later when you try to sell.

The second is private. A homeowners association enforces recorded covenants, conditions and restrictions through an architectural review committee. Its authority comes from a contract you agreed to when you bought the house. Its remedy is fines, forced removal, or a lien.

These do not substitute for each other. A stamped permit does not override your CC and Rs. An enthusiastic email from a board member does not satisfy the building department. Plan on running both tracks, and start the slower one first, which is almost always the HOA.

What tends to trigger a building permit

A flat concrete slab on grade in a private backyard is treated differently across jurisdictions, and some of the elements bolted to it are treated differently again. The items that commonly pull a court project into permit territory are these:

  • Fencing above a certain height. Court fencing is usually taller than standard yard fencing, and height thresholds are exactly where permits and design review both engage.
  • Electrical work. Court lighting means new circuits, conduit, and often a subpanel. Electrical is its own permit and its own inspection in most places.
  • Retaining walls. Terracing a sloped lot to create a level pad frequently means a wall, and walls above a threshold height need engineering and a permit.
  • Grading and drainage changes. Moving significant soil volume or altering how water leaves your lot can require a grading permit or a drainage review.
  • Shade structures and covers. Anything with a roof or a foundation is a structure, and structures get reviewed.
  • Lot coverage and impervious area. Some jurisdictions count hardscape toward coverage limits, so a large slab can matter even when the slab itself would not.

The practical rule: assume something on your project needs a permit, then ask. A five minute call to the counter costs nothing. Building after the fact and getting caught is a different order of problem entirely, and it is the sort of avoidable mess we listed in our roundup of court construction mistakes to avoid.

The general permitting sequence

Where a permit is required, the path looks broadly the same across valley jurisdictions even though the forms and portals differ.

You start with a site plan drawn to scale. It shows property lines, the existing house footprint, easements, the proposed court, setbacks from every line, and any walls, fencing or structures. If your property corners have never been located by a surveyor, this is the point where that gap becomes obvious. Do not scale a fence line off a satellite image and hope.

Next comes the supporting detail. Drainage or grading information showing where water goes and confirming you are not discharging onto a neighbor. Structural details and engineering for walls or tall fence posts. An electrical plan if lighting is included, with fixture locations, circuit information and mounting heights.

Then submittal and plan check. A reviewer reads the package, issues comments if something is missing or noncompliant, and you or your contractor respond with corrections. That back and forth is the part that consumes the calendar, and the number of rounds depends entirely on how complete the first submittal was. After approval the permit issues, and the work becomes subject to inspection at defined stages, typically before the pour and again at completion of the electrical and structural elements.

Timelines vary by jurisdiction, by season, and by how busy plan review is. Anyone who promises you a specific number of days without knowing your jurisdiction and your scope is guessing.

The HOA track: architectural review

If you live in a community with an association, this is usually the longer pole. Start here.

Pull your recorded CC and Rs and the current design guidelines. The guidelines are the document that actually matters day to day, because that is where the specifics live: fence heights and permitted materials, whether court fencing is allowed at all, lighting rules including shielding and shut-off hours, permitted surface colors, restrictions on structures visible from the street, and sometimes explicit hours of play.

Then submit an architectural review application. A complete submittal generally includes the same site plan you are preparing for the building department, elevations or product cut sheets for fencing and lighting, a color specification for the surface, and a construction schedule. Some associations require signed neighbor acknowledgment forms. Many meet on a fixed monthly cadence, which means a submittal that misses the packet deadline waits a full cycle.

Get the approval in writing and read the conditions attached to it. Conditional approvals are common and they carry real obligations: a lower fence than you asked for, a specific color, a restriction on light fixture type, or a requirement that landscaping screen the court from the street.

Where these applications actually get denied

Denials are rarely mysterious. The recurring ones are fence height above what the guidelines allow, lighting that is not shielded or has no automatic shut-off, a surface color the committee considers too visible, a proposed layout that encroaches into a setback or an easement, and drainage that sends new runoff toward a neighbor’s property.

Almost every one of those is a design decision that could have been made differently at no additional cost if it had been known on day one. That is the entire argument for solving approvals before the layout is locked, and it is one reason working with a local court builder matters more than most people expect. A builder who works the valley every week already knows which communities are strict about fence height and which ones care most about lighting.

Sequence this correctly

The order that causes the least pain looks like this. Confirm your property lines and locate your easements. Read your CC and Rs and design guidelines before you fall in love with a layout. Have a preliminary layout drawn that respects both the setbacks and the guidelines. Submit to architectural review. Confirm permit requirements with your building department for the specific elements in your scope. Prepare and submit the permit package. Only then sign a construction contract, or sign one that is explicitly contingent on approvals.

On who pulls the permit: in most cases your licensed contractor does, and that is the right answer. A contractor pulling under their own license carries the responsibility for code compliance and inspection. Owner-builder permits exist, and they move that responsibility onto you. Verify that whoever you hire holds a current Nevada State Contractors Board license for the classification the work falls under, and ask for the license number in writing rather than accepting a logo on a truck.

If you want the layout and the approvals thought through together, that is how we scope backyard court projects and larger new court construction work across the valley, including Henderson and the surrounding communities.

Frequently asked questions

Do I need a permit to build a sport court in my backyard?

It depends on your jurisdiction and on what your project includes. The slab, the fencing height, any lighting, retaining walls, shade structures and grading changes are each evaluated separately, and any one of them can trigger a permit. Contact your local building department with your specific scope before assuming you are exempt.

Is HOA approval the same as a building permit?

No. They are separate and independent. An HOA architectural review enforces private recorded covenants. A building permit enforces public code. Approval from one has no effect on the other, and you may need both.

What does an HOA architectural review committee usually want to see?

Typically a scaled site plan showing the court location and setbacks, elevations or product information for fencing and lighting, the proposed surface colors, and a construction schedule. Some associations also require neighbor acknowledgment forms. Check your community’s current design guidelines, since the requirements differ.

What happens if I build a court without approval?

On the public side you can face a stop-work order, correction requirements, or a problem that surfaces during a future property sale. On the HOA side you can face fines, a lien, or a demand to remove or modify the work at your expense. Both are far more costly than the approval process itself.

How long does approval take?

There is no reliable single answer. HOA committees often meet monthly, so the packet deadline drives that timeline. Plan review depends on jurisdiction, current workload and how complete the submittal is. Ask both bodies directly at the start and build their real answers into your schedule.

Working through approvals on a specific lot is easier with someone who has done it in your city. Reach us in Nevada at (702) 883-8386, in Arizona at (480) 878-2292, or request a project quote.
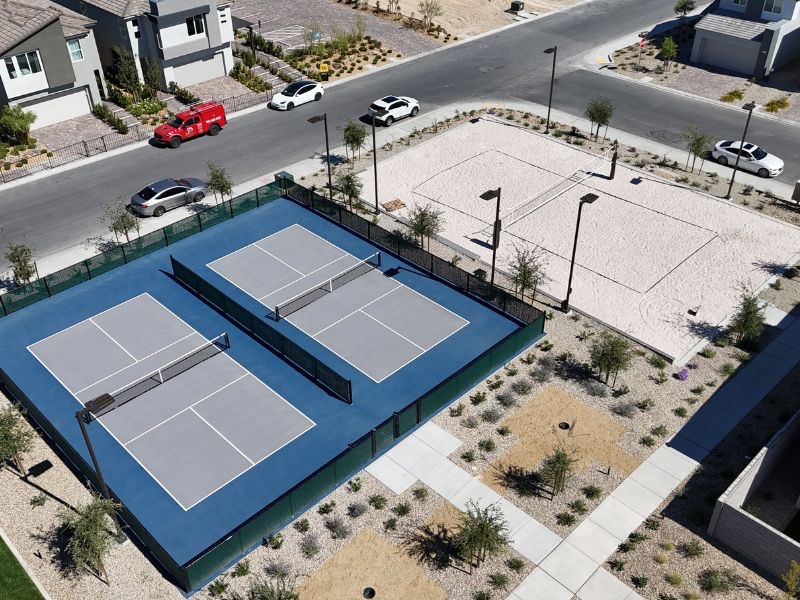
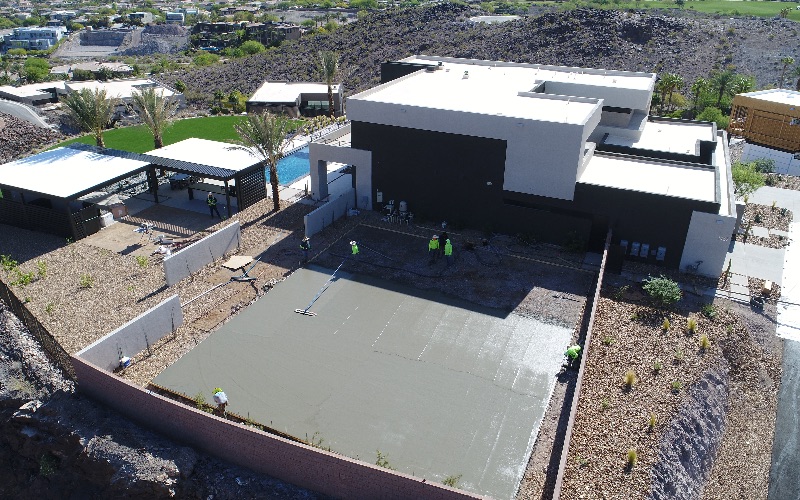
Pickleball Noise: What the Complaints Are Really About and How to Mitigate It

Pickleball noise mitigation has become the deciding factor on a lot of backyard and community court projects, and most of the advice floating around gets the problem wrong. People assume the complaint is about volume. It is not. A leaf blower is louder than a pickleball rally and nobody files a petition about the leaf blower.

The complaint is about the character of the sound and its repetition. Understanding that changes which fixes are worth paying for.

Why the sound is different

A pickleball hit is a short, sharp impact. A rigid composite paddle strikes a hard hollow plastic ball, and the result is a fast transient with most of its energy concentrated in a frequency band the human ear is very good at noticing. It is not a rumble. It is a crack.

Then it repeats. A rally produces a string of these impacts at a fast, irregular cadence, and the irregularity is the part that defeats habituation. Steady sound fades into background. Sound that keeps surprising you does not. A neighbor can sleep through highway traffic and be driven out of their yard by a doubles game two hundred feet away.

This is why measuring an average sound level and declaring the court compliant frequently satisfies nobody. Average levels describe energy over time. Annoyance from impulsive, repetitive sound is not captured well by an average, which is why some jurisdictions have started evaluating these installations differently than they would a mechanical noise source.

Distance and orientation are the cheapest tools you have

Sound level falls off with distance from the source. That relationship is the most reliable lever in the entire toolkit, and it costs nothing if you use it during siting rather than after construction.

Move the court as far from the nearest occupied structure as the lot allows, and pay attention to which structure. The nearest wall of your own house is not the concern. The concern is the neighbor’s bedroom window, their patio, and the outdoor space they actually use. Look at where those are before you pick a corner of the yard.

Orientation matters too, though less than distance. Play tends to project along the length of the court, so aligning the long axis away from the closest sensitive receiver helps at the margins. Court orientation is usually driven by sun angle first, and on a residential lot by whatever fits inside the buildable area, but where there is a choice, noise deserves a vote. We work these constraints together when laying out backyard pickleball court construction projects.

Barriers: what actually works

An acoustic barrier only does something if it meets three conditions. It has to break the line of sight between the impact point and the listener’s ear. It has to have enough mass per unit area to resist being driven by the sound. And it has to have no gaps.

Gaps are where most attempts fail. A barrier with a two inch gap along the bottom or open joints between panels leaks sound straight through, and the leak dominates whatever the panel itself would have blocked. Chain link fencing provides zero acoustic benefit no matter how tall it is, because it is almost entirely air.

Options that do work, in rough order of effectiveness:

  • Solid masonry walls and earth berms. Heavy, gapless, permanent. The best performers when height and setback allow them.
  • Mass-loaded acoustic curtain systems mounted to the fence. Purpose-built panels with a rated surface density, installed with overlapping seams and closed at grade. Effectiveness depends entirely on installation quality.
  • Dense composite or solid fence panels. Better than nothing, much better if sealed at the bottom, and their benefit degrades quickly if the boards shrink and open gaps.

Placement rule: a barrier does the most good when it is close to the source or close to the receiver, and the least good stranded in the middle of the gap. On a residential lot that usually means the court fence itself, which is a point in favor of treating the fence and the acoustic strategy as one design decision rather than two.

One more thing that surprises people: hard vertical surfaces near the court reflect sound. A tall stucco house wall running parallel to the court can bounce impacts toward a neighbor who would otherwise be shielded. Two parallel hard walls can create a corridor effect. Look at the reflective surfaces, not just the direct path.

Equipment changes the source itself

Everything above manages sound after it has been made. Equipment changes how much gets made.

Paddle and ball combinations vary meaningfully in how sharp the impact sounds. Manufacturers have responded to the noise conversation with lower-noise paddle designs and softer ball formulations, and USA Pickleball publishes equipment listings that reflect these categories. Verify current listings rather than accepting a marketing claim on a box.

For a private residential court, equipment is often the single most practical mitigation available, because you control it completely. You can buy the paddles. For a community or club installation it is harder, since you are asking players to change habits, but a posted equipment policy is still worth having.

Surfacing and enclosure choices that make it worse

Nothing about the court surface itself generates meaningful noise, but a few adjacent decisions can make the situation worse than it needed to be.

Fully enclosing a court with hard reflective surfaces on multiple sides increases reverberation inside the enclosure and can raise what escapes over the top. Solid vinyl windscreen is often assumed to be an acoustic product; it is not, and its main acoustic effect is reflection rather than absorption. Where a court sits in a hard-surfaced side yard between two walls, the geometry is working against you before a single ball is struck.

If you are converting an existing tennis court to pickleball, understand that you are changing the acoustic profile of that space substantially. More impacts per minute, sharper transients, and often more courts in the same footprint. A conversion that the neighbors accepted as a tennis court can generate real friction as a pickleball venue, which is worth discussing during the planning of any court conversion.

Operations do the rest

Design gets you most of the way. Behavior closes the gap.

Set and honor start and stop hours, and be conservative about early mornings, which generate more complaints than late evenings in most neighborhoods. If your court is lighted, put the curfew in the controller rather than in your memory. Talk to the adjacent neighbors before construction rather than after the first complaint, because people object far more strongly to what appears without warning. For shared or community courts, post the hours and the equipment policy where they are visible.

None of this is legally required in most places. All of it is cheaper than a dispute.

If you already have complaints

Work in this order. Change the equipment first, since it is immediate and inexpensive. Tighten the hours next. Then look for gaps in any existing barrier and close them, because sealing an existing fence usually outperforms adding height to it. Then add or upgrade the barrier where the direct path actually runs, which may not be where you assumed. Relocating the court is the last option and rarely necessary.

Get a measurement before and after each change if the situation is formal enough to involve a code officer or an HOA board. Documented improvement is far more persuasive than an assurance that it is better now.

We plan noise mitigation into layout, fencing and equipment selection on pickleball court projects, on residential backyard courts, and on commercial court installations where multiple courts sit close to occupied buildings. If you are in an HOA community anywhere in the valley, including Henderson, expect noise to be part of the approval conversation.

Frequently asked questions

Why is pickleball noisier than tennis?

The sound is not necessarily louder, it is sharper and more frequent. A rigid paddle striking a hard hollow ball produces a short impulsive crack with energy concentrated in a band the ear notices readily, and rallies produce those impacts at a fast irregular cadence. Impulsive, repetitive sound is far more annoying than steady sound at the same level.

Do acoustic barriers actually reduce pickleball noise?

Yes, when they are built correctly. A barrier must break the line of sight between the impact and the listener, have real mass, and have no gaps at the bottom or between panels. Chain link provides no benefit. A well-sealed solid wall, berm or mass-loaded acoustic curtain system does.

Do quieter paddles and balls make a real difference?

Equipment changes the sound at its source, which is why it is often the most practical fix on a private court. Paddle and ball combinations differ meaningfully in impact character, and USA Pickleball publishes equipment listings that reflect lower-noise categories. Check current listings rather than relying on packaging claims.

How far should a pickleball court be from a neighbor’s house?

There is no universal distance, and the right answer depends on lot geometry, barriers, intervening structures and local rules. Sound level drops with distance, so more separation always helps. Measure to the neighbor’s bedroom windows and outdoor living space rather than to the property line.

Can I convert a tennis court to pickleball without creating a noise problem?

You can, but plan for it. A conversion typically means more impacts per minute and often more courts in the same footprint, so the acoustic profile changes even though nothing about the location did. Address barriers, hours and equipment as part of the conversion rather than afterward.

If noise is the obstacle standing between you and a court, we can work the siting, fencing and equipment together. Call Nevada at (702) 883-8386 or Arizona at (480) 878-2292, or request a project quote.
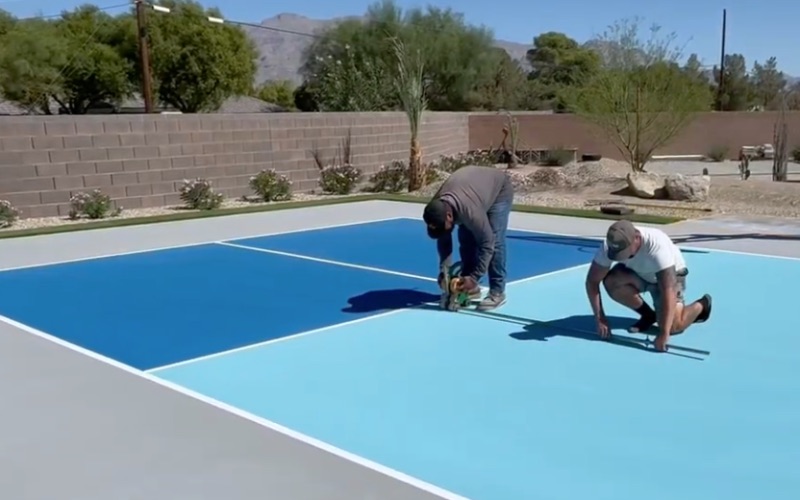
Expansive Soil and Post-Tension Slabs in the Las Vegas Valley

An expansive soil concrete slab in Las Vegas behaves differently from a slab poured on stable ground, and the difference does not show up on the day the concrete is finished. It shows up in year two, after the first full wet and dry cycle, as a crack that opens in one season and closes in the next.

Homeowners here have usually heard the phrase from a foundation contractor or a neighbor. Fewer people know what the soil is actually doing, why the desert of all places has this problem, or what a post-tension slab does about it.

What expansive soil does

Certain clay minerals take water into their structure. When they do, the soil swells. When the water leaves, it shrinks. The cycle repeats indefinitely and it can move a great deal of material.

The damaging part is that the movement is never uniform. Soil under the middle of a slab stays at a fairly constant moisture level because it is covered. Soil at the perimeter is exposed to rain, irrigation, evaporation and root uptake, so it swings. That difference produces differential movement, where one part of a slab rises or falls relative to another, and differential movement is what cracks concrete. Uniform movement would just lift the whole court and nobody would notice.

Two patterns get named. Edge lift is when the perimeter swells upward relative to the center, which typically happens when water gets in at the edges. Center lift is the reverse, when the interior gradually gains moisture and the perimeter dries out.

Why this happens in a desert

This is the part that catches people. Annual rainfall in the valley is low, so how does clay get wet enough to swell?

The answer is that the water almost never comes from the sky. It comes from irrigation systems running daily against a court perimeter. From a pool that leaks slowly. From a hose bib drip nobody noticed. From a downspout discharging in one place year after year. From a neighbor’s grading directing runoff into your side yard. Introducing consistent water into soil that has been dry for a very long time is exactly the condition that produces the biggest volume change.

The valley also has a second and less discussed problem: collapsible soils. Some soils here are stable while dry and lose volume abruptly when wetted, settling rather than swelling. The result looks similar from above, and the trigger is the same, which is water arriving where it historically did not.

And under both of those sits caliche, a cemented layer that resists infiltration and causes water to spread sideways instead of draining down. Get water into a caliche-bounded pocket and it stays there.

How to find out whether you have it

The reliable answer is a geotechnical investigation. Borings, sampling and laboratory testing establish the soil profile and its plasticity, and the report gives an engineer what they need to design a foundation for it. That is a real cost, and on a small residential court it is not always justified.

The practical signals are worth reading first. Does the house have foundation repair history? Do interior doors stick seasonally? Is the driveway or the pool deck cracked in a pattern that opens and closes through the year? Have neighbors had foundation work? Is the neighborhood built on an area known locally for problem soil? If several of those are true, get the report. It is far cheaper than rebuilding a court.

Three ways to engineer around it

There are three broad strategies and good projects often use more than one.

Remove and replace. Excavate the expansive material to a designed depth and replace it with an engineered, non-expansive fill. Straightforward, effective, and priced by the volume of dirt, which is why it gets less attractive as the clay gets deeper.

Control the moisture. If volume change is driven by moisture change, keeping moisture constant reduces the movement. This means perimeter drainage that moves water away decisively, irrigation kept off the court perimeter, no thirsty planting or trees near the edge, root barriers where needed, and leaks repaired immediately. Moisture control is the cheapest strategy and the one most often abandoned six months after handoff.

Stiffen the structure. Design the slab so it behaves as a single rigid plate and rides over the differential movement instead of fracturing. That is what a post-tension slab does.

What a post-tension slab is

A post-tension slab contains high strength steel strands inside plastic sheathing, laid out on a grid before the pour. After the concrete gains enough strength, the strands are tensioned with a hydraulic jack and anchored at the slab edges.

Tensioning the steel puts the concrete into compression. Concrete is strong in compression and weak in tension, and cracking is a tension failure, so pre-compressing the slab makes it far more resistant to the tensile stresses that differential soil movement produces. The tendon grid also ties the whole slab together into one stiff element rather than a collection of panels that can move independently.

This is not exotic. Post-tension foundations are standard practice for residential slabs across large parts of the Southwest and Texas precisely because of these soils. Applying the same approach to a court slab is a known solution.

Two conditions apply. It has to be engineered, with the tendon layout, spacing and stressing designed for the specific soil and slab geometry, not copied from another job. And the stressing has to be documented, with elongation measurements recorded and the as-built tendon layout kept.

What a post-tension slab means for you afterward

This section matters more than any other on this page.

Do not cut, core, drill or saw into a post-tension slab without locating the tendons first. The strands are under very high tension. Cutting one is dangerous to the person doing it and expensive to repair, and it compromises the slab in that zone.

The practical consequence is that everything requiring a penetration has to be planned before the pour. Volleyball and tennis net post sleeves. Basketball goal anchors. Fence post footings inside the slab edge. Drain inlets. Conduit for lighting. Anchors for a shade structure. All of it gets located, sleeved and blocked out in advance, because adding it later is a specialized operation involving tendon scanning rather than a guy with a hammer drill.

Keep the as-built tendon drawing with your property records and give it to any contractor who works on the court later. If the slab edges are stamped or tagged to identify it as post-tensioned, leave those markings visible.

When post-tension is not the answer

Not every site needs it. A court on stable, well drained granular soil with a properly built base does not benefit enough to justify the engineering and the operational constraints.

It is also not a fix for bad water management. A post-tension slab sitting on a saturated, poorly drained subgrade will hold together longer than a conventional slab, but the underlying condition is still there, and it will show up in the base and at the perimeter. Structure and drainage solve different problems, and choosing one to avoid paying for the other is the sort of decision covered in cutting corners on a sport court.

Living with it after construction

The owner’s job on an expansive site is moisture stability. Keep irrigation away from the court perimeter and fix broken heads promptly. Keep the perimeter grade sloping away and do not let it flatten out over the years as landscaping gets added. Avoid planting large water-seeking trees near the edge. Deal with pool leaks and hose bib drips as urgent rather than cosmetic. Watch for new cracking that opens and closes seasonally, and get it looked at early rather than after it has propagated.

Courts fail slowly on these soils, which means there is almost always time to intervene if somebody is paying attention. The failure patterns are catalogued in why sport courts crack, and the point at which repair stops making sense is covered in resurface versus replace.

We build on these soils across the valley, including Las Vegas and the surrounding communities, on both backyard courts and larger new court construction projects.

Frequently asked questions

Does Las Vegas have expansive soil?

Parts of the valley do, and the distribution is uneven from one area to another. The region also contains collapsible soils that lose volume when wetted and caliche layers that trap water. A geotechnical investigation is the only way to know what is under a specific lot.

How does expansive soil damage a sport court?

Through differential movement. Soil under the covered center of a slab holds a fairly steady moisture level while soil at the perimeter swings with irrigation, rain and evaporation. One part rises or falls relative to another, and the resulting tensile stress cracks the concrete.

What is a post-tension slab?

A concrete slab containing sheathed high strength steel strands that are tensioned after the concrete gains strength. Tensioning puts the slab into compression, which resists the tensile stresses that cause cracking, and ties the slab together into a single stiff plate that can ride over uneven soil movement.

Can you drill into a post-tension slab?

Not without locating the tendons first, which requires scanning by someone equipped to do it. Cutting a tensioned strand is dangerous and expensive to repair. Plan every penetration, including net post sleeves, goal anchors, conduit and drains, before the slab is poured.

Do I need a post-tension slab for a backyard court?

Only where the soil warrants it. On stable, well drained ground a conventionally reinforced slab on a properly built base performs well. Where expansive or collapsible soils are documented, an engineered post-tension design is a proven response. The soils report drives the decision, not a preference.

If you are building on ground you have doubts about, we would rather look at it before design than after the first crack. Call Nevada at (702) 883-8386 or Arizona at (480) 878-2292, or request a project quote.
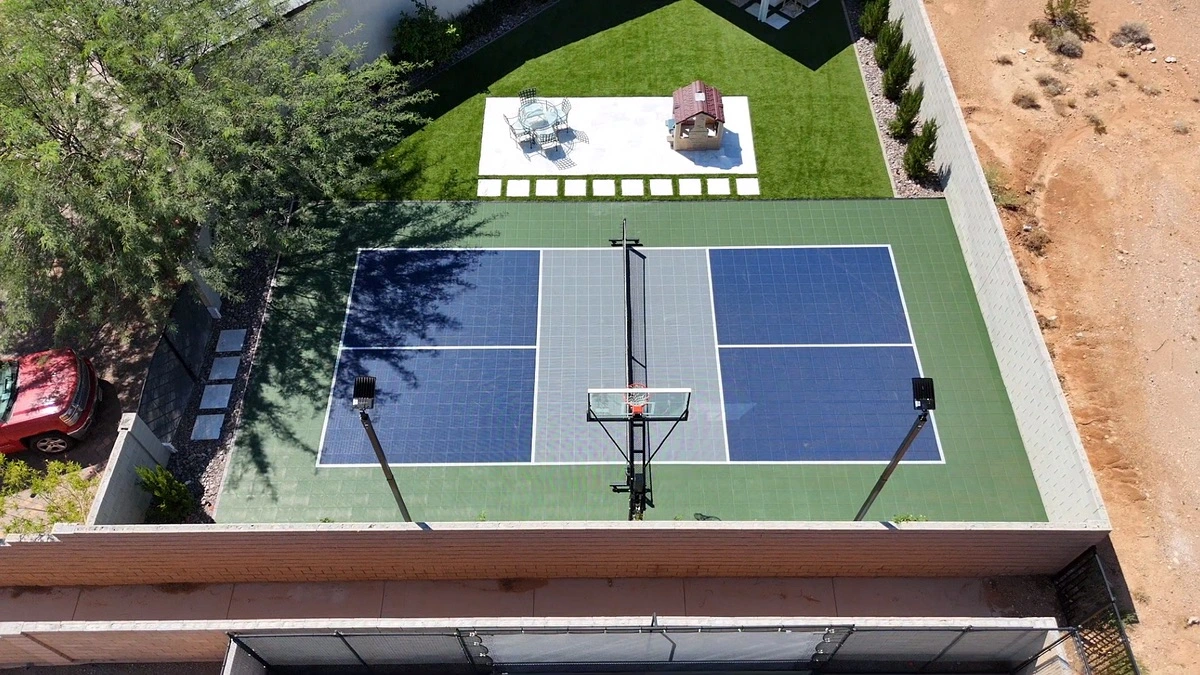
What Is Under a Court: Subgrade, Base and Why They Decide the Lifespan

Sport court base construction is the part of the job nobody photographs and everybody pays for twice when it is done badly. Buyers choose a color. They compare surface systems. Then the court is finished, the pretty layer is on top, and every question about how long it lasts has already been answered by material nobody will ever see again.

Some of the courts we built decades ago are still flat and still in service. The surface on those has been redone more than once, which is normal. The structure under them has never been touched, which is the entire point.

The stack, bottom to top

A hard court is a layered system. Each layer has one job and depends completely on the one below it.

  • Native subgrade. The existing soil, cut or filled to a designed elevation, moisture conditioned and compacted.
  • Aggregate base. A graded crushed rock layer that spreads load and provides a working platform.
  • The slab. Concrete in most of the Southwest, reinforced and jointed.
  • Surface system. Acrylic color coatings, or a modular tile system, or synthetic turf depending on the sport.

The failure mode people expect is the top layer wearing out. That does happen, and it is normal maintenance. The failure that ends a court’s life starts at the bottom.

Subgrade: the layer nobody photographs

Subgrade work is unglamorous and it is where the lifespan is decided.

First, strip everything that is not soil. Topsoil, roots, buried irrigation, old landscape fabric, construction debris. Organic material decomposes and leaves a void. Anything that can rot or settle has to leave the site.

Second, get the moisture right. This is the step most often skipped in the desert. Soil compacts properly only within a narrow band around its optimum moisture content, and native soil here is usually far drier than that. Running a roller over dry soil produces a surface that looks compacted and is not. Water has to be added, mixed in, and given time to distribute through the lift before compaction means anything.

Third, compact in controlled lifts and verify. Compaction is specified as a percentage of maximum dry density determined by a Proctor test, and it is verified in the field with a density gauge or sand cone. Ask whether your project has a compaction specification and whether anyone is testing to it. On a residential job the honest answer is frequently no, and that is a choice worth making deliberately rather than by default.

Fourth, proof roll. Drive a loaded vehicle across the finished subgrade and watch. Anything that pumps, ruts or springs under the tire is a soft spot, and it needs to be over-excavated and replaced with compacted material rather than bridged over and hoped about.

A geotechnical report is not required on most residential courts, but it earns its keep on sites with known expansive clay, deep uncontrolled fill, a high water table, or a history of movement in nearby structures. If your house has foundation history, your court will have foundation history.

The aggregate base

The base layer spreads concentrated load across the subgrade and gives the crew a stable platform to build on. Two things matter: the material and the compaction.

Material means a graded crushed aggregate with a specified gradation, not whatever the nearest yard is selling as fill. A well graded base has a distribution of particle sizes that lock together under compaction. Uniform round material does not lock, and material with too many fines holds water and behaves like soil.

Thickness is a design decision driven by subgrade strength, expected loading and the slab above. There is no single correct number, and anyone who quotes one without asking about your soil is reciting rather than designing.

A geotextile separation fabric between subgrade and base costs very little and does something specific: it stops fine soil particles from migrating up into the base under repeated wetting and loading. Without it, the base slowly becomes contaminated, loses its drainage capacity and stops behaving like a base. This is one of the first line items to disappear when a bid is being sharpened, and it is one of the reasons we wrote about cutting corners on a sport court.

The slab

Most courts in Southern Nevada and Arizona are concrete. Concrete tolerates heat better than asphalt, holds its plane longer, and is a better substrate for acrylic surfacing over the long run.

Reinforcement. Rebar, welded wire mesh or fiber, and the choice matters less than the placement. Steel does nothing sitting on the ground. It has to be supported on chairs at the specified height within the slab and stay there through the pour. Pulling mesh up with a hook while the concrete goes down is a technique that exists and it does not work reliably. Walk the pad before the pour and look at whether the steel is supported.

Joints. Concrete shrinks as it cures and it will crack. Control joints decide where. Sawcuts have to be made within a specific window after the pour, deep enough to create a real plane of weakness, and laid out in panels that avoid long thin rectangles and re-entrant corners. Late sawcutting is a common cause of random cracking that gets blamed on soil, and shallow sawcutting simply does not control anything.

Curing. This is where the desert punishes shortcuts. High temperature, low humidity and wind together drive surface evaporation faster than bleed water can reach the top, and the result is plastic shrinkage cracking that appears within hours of placement. The countermeasures are known: schedule the pour for the cooler part of the day, use windbreaks, apply an evaporation retarder, and cure properly with a curing compound or wet cure. Summer pours in Las Vegas and Phoenix demand this attention. Winter pours are easier and are one reason scheduling matters.

Finish. The finish has to suit what goes on top. A hard steel-troweled surface is dense and slick, and acrylic coatings do not bond to it well without preparation. Court slabs are typically finished to a texture appropriate for coating, and the surface is then prepped and profiled before the system goes down.

Where the surface system fits

The surface is a wear layer and a playing characteristic, not a structural component. Acrylic systems bond to the slab and take on its geometry and its cracks. Modular tile spans small imperfections and drains, but tile does not repair a slab that is moving, and a failing base will telegraph through any product on top of it. Our overview of court surface options and the detail on court flooring tiles cover those choices.

Concrete needs to cure before it gets coated. Coating too early traps moisture and produces blistering and delamination that is not the coating manufacturer’s fault. Where moisture is a question, a moisture test before surfacing is cheap insurance.

How to tell whether it was done right

You mostly cannot, after the fact. So ask before.

Ask for the base section: subgrade preparation, base material and thickness, slab thickness, reinforcement type and placement, and joint layout. Ask whether compaction will be tested and by whom. Ask for concrete delivery tickets and the mix design. Ask what the curing method will be and what the plan is if the pour lands on a very hot day. Ask to see the joint layout drawing before the pour rather than after.

A builder who does this work properly will answer those questions immediately, because they already made those decisions. A builder who gets vague is telling you something useful.

What base failure actually looks like

Random cracking that does not follow the joint pattern. Cracks that open and close with the seasons. Panels that have moved relative to each other so one edge sits proud of the next. Depressions that hold water where none existed at handoff. Coating that fails repeatedly in the same location after being repaired.

Those symptoms are structural, and resurfacing does not fix any of them. It covers them for a season or two. The full diagnostic breakdown lives in why sport courts crack, and the decision framework for what to do about it is in resurface versus replace.

We build to the section, not to the bid, on every new court construction project in Nevada and Arizona.

Frequently asked questions

How thick should a sport court slab be?

There is no universal thickness. It is a design decision based on subgrade strength, aggregate base thickness, soil behavior, reinforcement and expected use. A builder should tell you the specified thickness for your project and why. Be skeptical of anyone who quotes a number before asking about your soil.

What is the base under a sport court made of?

Typically a graded crushed aggregate placed and compacted over a prepared subgrade, often with a geotextile separation fabric between the two. The gradation matters as much as the depth, since well graded material locks together under compaction while uniform or fines-heavy material does not.

Can a good surface make up for a bad base?

No. Acrylic coatings take on the geometry of the slab, and while modular tile spans minor irregularities, neither product stops a moving slab. A base problem shows through whatever is installed above it, usually within a few seasons.

Why do courts crack when the concrete is new?

Cracking within hours or days of placement is usually plastic shrinkage caused by rapid surface evaporation, which desert heat, low humidity and wind all accelerate. It is controlled through pour timing, windbreaks, evaporation retarders and proper curing. Cracking that appears later and ignores the joint pattern generally points to subgrade or base problems.

Do I need a soils report for a backyard court?

Not on most residential projects. It becomes worth the cost on sites with expansive clay, deep or uncontrolled fill, prior settlement in nearby structures, or unusual grading. If the house has a foundation history, get the report.

If you want the section specified in writing before you sign anything, call Nevada at (702) 883-8386 or Arizona at (480) 878-2292, or request a project quote.
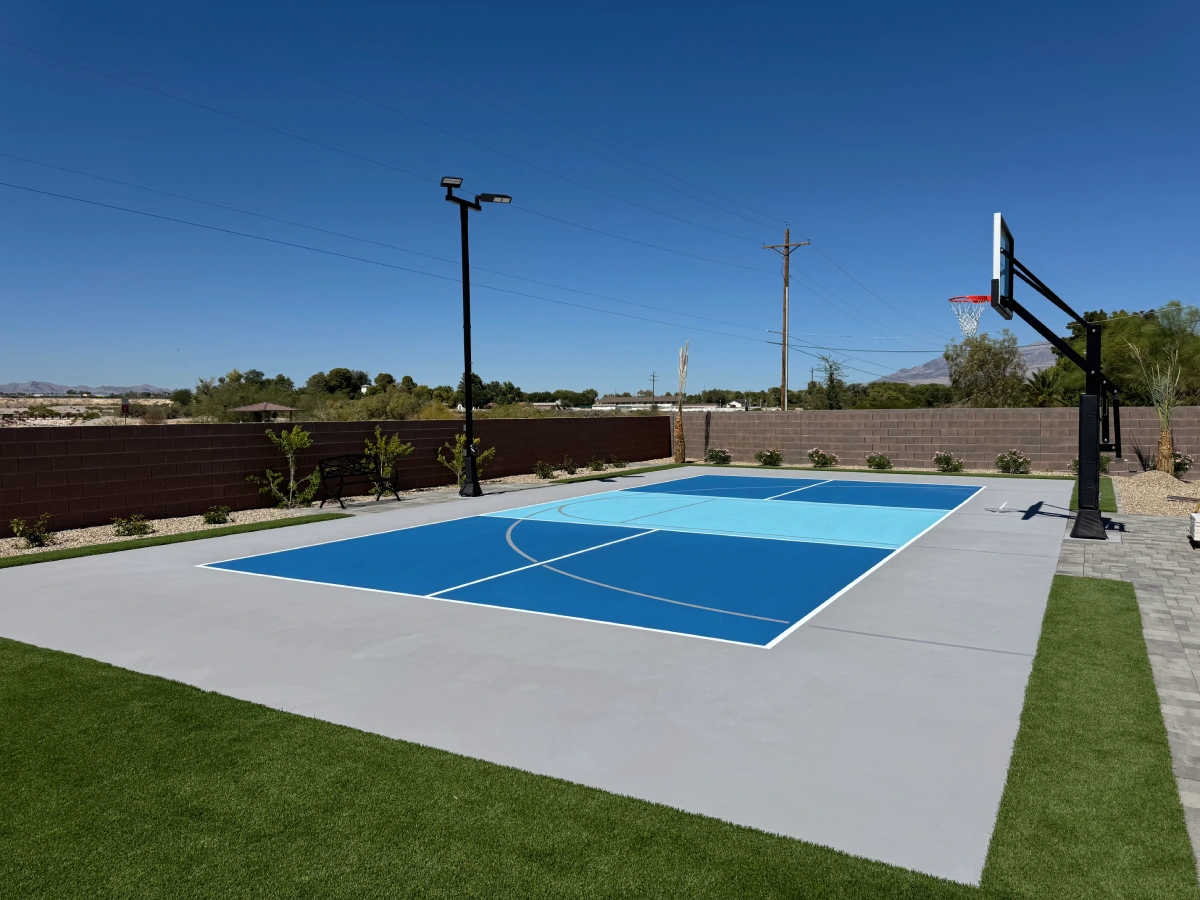
Setbacks, Easements and Property Lines: Siting a Court Legally

Court setback requirements are the reason a project that looked fine on a napkin suddenly does not fit. A homeowner measures the flat part of the yard, gets a number that clears the court dimensions with room to spare, and then a surveyor shows up and the usable envelope shrinks by six feet on two sides.

This is fixable. It is only expensive when it gets discovered late, after the fence posts are set or the concrete is down. Everything below is the general framework. Zoning is local, it varies between unincorporated county and incorporated cities, and it changes. Confirm your specific numbers with your own planning or building department before you commit to a layout.

The three lines that constrain your court

Three different limits control where a court can sit, and people routinely confuse them.

The property line is the legal boundary of your parcel. It is defined by the recorded plat and located on the ground by a licensed surveyor. It is not the fence. Fences get built to convenience, to old agreements, and to whatever the previous owner assumed, and it is common for a block wall to sit a foot or more off the actual line in either direction.

The setback is a zoning-imposed buffer measured inward from the property line. Front, side and rear setbacks are usually different numbers, and corner lots carry a second front setback on the street side. Some zoning districts also apply a separate accessory structure setback that is different from the setback for the house.

The easement is a recorded right that somebody else holds across part of your land. You still own the ground. You cannot obstruct it. Utility easements, drainage easements, access easements and public utility easements along rear and side lot lines are all common in valley subdivisions, and they are frequently wider than owners expect.

These stack. A court has to clear the setback and stay out of the easement, and where the two overlap the more restrictive one controls.

Why a survey is not optional on a tight lot

If your court fits with several feet of slack on every side, a careful measurement from a recorded plat may be enough. If it fits by inches, get a survey.

A boundary survey locates your actual corners, sets stakes, and gives you a document you can put in a permit package. It also flags the surprises: a wall built over the line by a previous owner, an easement that is wider than the plat suggested, a utility box sitting where you wanted the fence post.

We have walked jobs where the owner was certain of the boundary because a fence had been there for twenty years. Adverse possession arguments are messy, slow, and not something you want to discover mid-build. Locate the line, then design to it.

What actually counts as encroachment

The slab is only one part of the footprint. Reviewers look at the whole assembly.

  • Fence posts and footings. The post footing extends beyond the post. A fence line drawn exactly at the setback can put concrete into the buffer.
  • Fence height in the setback. Many zoning codes allow a low fence in a setback and require a taller one to sit further in. Court fencing is tall by definition.
  • Overhang. A basketball backboard cantilevers. A shade sail extends past its posts. Roof overhangs on a cover project past the columns.
  • Light poles. Poles are structures, and they have footings and a fall radius that some jurisdictions consider.
  • Retaining walls. A wall built to create a level pad has a footing that extends toward the downhill side, sometimes well past the face of the wall.
  • Drainage discharge. Concentrating runoff into an easement or across a boundary is its own problem even when nothing physical crosses the line.

Design from the outside in. Start with the property line, subtract the setback, subtract the easement, subtract the footing and overhang allowances, and whatever rectangle is left is your buildable envelope. Then see what fits inside it.

When the court does not fit

This is where good design earns its keep, because there is almost always a version that works.

Reduce the dimension that matters least. A full regulation footprint is not the only option, and out-of-bounds run-off space can be trimmed on one end more comfortably than on the other depending on the sport. Our court dimensions guide covers the playing areas and the surrounding clearances for each sport, and the clearance numbers are usually where the flexibility lives.

Rotate the layout. Turning a court a few degrees off parallel with the house frequently recovers the needed clearance on a wedge-shaped or pie lot. It looks unusual on paper and plays fine.

Change the configuration. A half court, a shortened multi-use layout, or a shared-line arrangement that overlays two sports on one slab all reduce the required envelope. A multi-game court is often the answer on a lot that cannot hold a single-sport regulation footprint, and we cover the tradeoffs in multi-purpose court design for Nevada and Arizona.

Reconsider the location. The flattest part of the yard is not always the most permissive part. Moving the court toward the interior of the lot costs more in grading and gains you clearance on every side.

Variances and encroachment permits

Where the numbers cannot be made to work, there are formal remedies. A zoning variance is a request for relief from a specific setback requirement, decided by a hearing body, usually with notice to neighbors and a demonstration of hardship that is specific to the property rather than to your preferences. An encroachment permit or easement encroachment agreement is a separate instrument that allows a defined improvement within an easement, subject to the easement holder’s conditions, which typically include your obligation to remove it at your own cost if they need access.


Both take time. Both can be denied. Neither is a formality. Treat them as a fallback, not a plan, and get an honest read from your planning department before you spend money designing around an approval you may not get.

Neighbors, walls and the shared-boundary problem

Most valley backyards are bounded by a shared block wall. That wall belongs to someone, or to both parties, depending on how the subdivision was recorded. Attaching a court fence to it, mounting lights on it, or excavating close enough to undermine its footing are all things that generate disputes.

Do not attach to a shared wall without knowing who owns it and having something in writing. Do not excavate against its footing without understanding how deep that footing goes. A court cut that undermines a neighbor’s wall is a fast route to a claim, and it is entirely avoidable with a hand-dug test hole before the excavator arrives.

Talking to the neighbor early also costs nothing and prevents a surprising amount of trouble. People object to what appears without warning far more than to what they were told about.

Get this in writing before you sign

A competent proposal for a new court should reference a specific layout on a specific plan, with the property lines, setbacks and easements shown. If the proposal you are holding shows a court floating on a satellite image with no boundary information, you do not have a plan. You have a sketch.

Ask for the buildable envelope in writing. Ask what the layout assumes about the property line and whether that assumption came from a survey or from a fence. Ask who is responsible if the layout turns out to encroach. Those three questions separate builders quickly, which is one more reason choosing a local court builder tends to save money on the back end.

We size and site courts around real boundary constraints on backyard court projects and on new court construction throughout Southern Nevada and Arizona.

Frequently asked questions

How far from the property line does a sport court have to be?

There is no universal number. Setbacks are set by your zoning district and differ for front, side and rear lines, and corner lots carry additional requirements. Some jurisdictions treat a court and its fencing as accessory structures with their own setbacks. Ask your planning or building department for the setbacks that apply to your parcel.

Can I build a sport court over a utility easement?

Generally no, not without written permission from the easement holder. Even where an encroachment agreement is possible, it usually obligates you to remove the improvement at your own expense if access is needed. Locate every recorded easement before you design the layout.

Do I need a survey before building a court?

If the court fits comfortably within the buildable area, a careful layout from the recorded plat may be sufficient. If it fits by a small margin, or if the existing fence is your only reference for the boundary, get a boundary survey. Fences are frequently not on the property line.

Does the fence count toward the setback or just the slab?

In most jurisdictions the fence, its footings, light poles and any overhanging equipment are all evaluated, not just the concrete. Tall fencing is often subject to stricter placement rules than low fencing. Confirm how your jurisdiction measures it before finalizing the fence line.

What if my court will not fit within the setbacks?

Usually the layout can be adjusted: reduce non-essential clearance, rotate the court, switch to a half court or a multi-sport configuration, or relocate to a different part of the lot. A variance is a last resort, requires a hearing, and is not guaranteed.

If you want the buildable envelope worked out before you spend anything on design, call us in Nevada at (702) 883-8386 or in Arizona at (480) 878-2292, or request a project quote.

Court Lighting Without the Neighbor Complaints: Fixtures, Shielding and Dark-Sky Rules

Sport court lighting is the single most common reason a finished court becomes a problem with the people next door. The slab does not bother anyone. The fence does not bother anyone. Then someone flips on four unshielded floods at nine at night and the phone calls start.

The good news is that this is an engineering problem with known solutions, and almost all of the fixes are cheaper to specify up front than to retrofit later. What follows is how we approach lighting design on residential and commercial courts across Southern Nevada and Arizona.

Three complaints that get lumped together

When a neighbor says “your lights are too bright,” they usually mean one of three distinct things, and each has a different fix.

Glare is direct light from the source reaching an eye. It is what happens when a bare LED array is visible from a bedroom window. Glare is about the fixture and its optics, not about how much light lands on your court.

Light trespass is light spilling onto property that is not yours: a wash across the neighbor’s patio, a bright patch on their back wall. It is about aiming, cutoff and mounting height.

Sky glow is light escaping upward. Nobody is bothered by it at the fence line, but it is what dark-sky ordinances exist to control, and it is the one a code official cares about.

A system can be perfect on one and terrible on another. Fully shielded fixtures aimed badly still trespass. Well-aimed fixtures with no glare control still blind anyone who looks at them.

The numbers that matter, and the one that does not

Wattage is not a design specification. Neither is raw lumen output. Both describe the fixture. Neither describes what happens on your court.

Two measures do the real work. Illuminance is how much light lands on the playing surface, expressed in foot-candles. Uniformity is the relationship between the brightest and darkest points on that surface, usually expressed as a maximum-to-minimum ratio. A court with high average illuminance and poor uniformity plays worse than a dimmer court that is even, because the eye adapts to the bright zone and the ball disappears in the dark one.

The Illuminating Engineering Society publishes recommended illuminance levels by sport and by level of play. Recreational residential play sits at the low end of those recommendations. Competitive and broadcast levels are far higher, and specifying a competition level for a backyard court is the fastest way to create a nuisance while spending money you did not need to spend. Ask any lighting proposal for a point-by-point photometric plan showing calculated foot-candles on a grid across the court, the uniformity ratio, and the calculated light levels at your property lines. If a vendor cannot produce that, they are guessing.

Fixture selection

The specification items that actually control complaints are these:

  • Full cutoff optics. A fully shielded fixture emits no light above horizontal. This is the single most important characteristic, and it is also usually the one a code official checks first.
  • BUG rating. The backlight, uplight and glare rating system published by the Illuminating Engineering Society gives you a comparable way to evaluate spill and glare between fixtures. Lower numbers in each category mean less stray light. Ask for the rating rather than the marketing copy.
  • Color temperature. Warmer light, around 3000 kelvin, is less objectionable at night and is what many outdoor lighting ordinances now require. Cool 5000 kelvin light reads as harsher and scatters more in the atmosphere. The playability difference on a residential court is negligible.
  • Asymmetric distribution. A forward-throw optic puts light on the court and keeps it off the area behind the pole. On a tight lot this matters more than any other optical choice.
  • Visors and house-side shields. External accessories that block the specific direction causing a problem. Cheap, effective, and frequently the entire solution on a retrofit.
  • Dimming and zoning. Being able to run at fifty percent for a casual evening game, or to light half the court, prevents a lot of unnecessary output.

Note that none of this is the same conversation as a hoop-mounted light. Product-level lighting attached to a goal, which we cover under basketball hoop lighting systems, solves a different problem and does not involve poles, photometrics or ordinance compliance in the same way.

Mounting height and aiming

There is a counterintuitive rule here: taller poles usually produce fewer complaints, not more.

Light aimed downward from height reaches the court at a steeper angle. That means less of the beam travels horizontally toward a fence line, and the fixture itself sits further outside the normal field of view of someone standing at ground level next door. Short poles force a flatter aiming angle to cover the same court, and flat aiming is what throws light sideways.

The tradeoff is that a taller pole is more visible during the day and more likely to run into height limits in zoning or HOA guidelines. That constraint is real and it belongs in the conversation early, alongside setbacks and fence height.

Aiming discipline matters as much as height. Fixtures should be aimed across the court, never outward across a property line. Aiming should be documented and verified at night with a meter, not eyeballed by whoever was on the lift that afternoon. Poles are typically placed along the sidelines rather than behind the baselines for court sports, which keeps the fixtures out of the primary sight lines of play.

Ordinances and dark-sky rules

Outdoor lighting is regulated more than most homeowners expect, and Arizona in particular has a long history of outdoor lighting codes tied to protecting the night sky. Several jurisdictions in both states have adopted standards that address shielding, maximum color temperature, curfew hours, and permitted light levels measured at the property line.

Requirements differ by jurisdiction and they change. Verify your specific rules with your local building or planning department before you buy fixtures, and read your HOA design guidelines separately, since associations frequently impose curfews and fixture restrictions that are stricter than code. This is one of the elements most likely to come back as a condition on an architectural approval.

In practice, communities in the northeast valley and the Scottsdale area tend to be among the more particular about lighting, but assumptions are not a substitute for reading the current guidelines for your community.

Controls prevent more complaints than fixtures do

The most effective complaint prevention is not optical. It is a hard shut-off.

A time clock that kills the lights at a set hour, every night, without depending on anyone remembering, removes the single most common trigger. Neighbors tolerate an hour of evening play. They do not tolerate lights left on until two in the morning because a teenager went inside and forgot.

Build in a manual on with automatic off, so lights can never be left running. Add an astronomical time clock so the schedule tracks sunset through the year. Add zone control so a casual shoot-around does not require the full array. If you told your HOA the lights go off at ten, put that in the controller rather than in your memory.

Fixing a court that already generates complaints

Retrofits are usually cheaper than people fear, because the problem is rarely the amount of light. Start with re-aiming, which costs a lift and an evening. Add house-side shields or visors to the specific fixtures causing spill. Dim the system and see whether play is still comfortable, since many existing courts are substantially over-lit. Swap cool fixtures for a warmer color temperature if the complaint is about harshness. Add a hard curfew on the controller and tell the neighbor you did it.

Replacing poles is the last resort, not the first move. Get a night reading at the property line before and after each change so you have something objective to point at.

We plan lighting alongside layout, fencing and approvals on backyard court projects, on multi-game courts, and on larger new court construction, because retrofitting conduit into a finished slab is exactly the kind of avoidable expense covered in our list of court construction mistakes to avoid.

Frequently asked questions

How bright should a backyard sport court be?

Bright enough to track the ball and even enough that there are no dark zones, which is usually far less light than people assume. The Illuminating Engineering Society publishes recommended levels by sport and level of play, and recreational residential courts sit at the low end. Ask for a point-by-point photometric plan rather than choosing by wattage.

What is a full cutoff light fixture?

A fully shielded fixture that emits no light above the horizontal plane. It keeps light on the court instead of sending it sideways into neighboring property or upward into the sky, and it is commonly the first thing an outdoor lighting ordinance requires.

Will taller light poles bother my neighbors more?

Usually the opposite. Greater mounting height allows a steeper downward aiming angle, which puts less light traveling horizontally toward a fence line and moves the fixture out of the normal line of sight from adjacent yards. The constraint on height is typically zoning or HOA guidelines rather than glare.

Do I need a permit for court lighting?

New circuits, conduit and poles generally require an electrical permit and sometimes a structural review for pole foundations, but requirements vary by jurisdiction. Some areas also apply outdoor lighting standards covering shielding, color temperature and curfew. Confirm with your local building department, and check your HOA design guidelines separately.

Can I fix glare on a court that is already built?

Often yes, and usually without replacing the poles. Re-aiming, adding house-side shields or visors, dimming an over-lit system, and switching to a warmer color temperature all address glare and spill directly. Adding an automatic shut-off resolves the timing complaints that shielding cannot.

If you are planning lighting for a new court or trying to solve complaints on an existing one, call us in Nevada at (702) 883-8386 or Arizona at (480) 878-2292, or request a project quote.

Court Fencing and Netting: Systems, Heights and What Drives the Spec

Sport court fencing is usually the second largest line item on a court project and the one people think about least until they are looking at bids that differ wildly. Two proposals can both say “chain link enclosure” and describe completely different products with completely different service lives.

Understanding what actually drives the specification makes those bids comparable. It also stops you from buying more fence than you need, which happens as often as the opposite.

What the fence is for

Start here, because the answer changes the design.

On most residential courts the fence exists for ball containment. It is not a security barrier and it is not primarily a boundary marker. The design question is where balls go when players miss, and how far they travel before they stop. Everything about height and placement follows from that.

Secondary purposes matter too. A fence keeps small children and dogs out of an active court. It gives windscreen something to attach to. On a court near a pool it becomes part of the barrier conversation, which carries its own code requirements. And on a sloped lot it prevents a rolling ball from ending up two properties away.

Height is geometry, not preference

There is no single correct fence height, and paying for a uniformly tall enclosure all the way around is usually wasted money.

Height follows ball behavior by sport. On a basketball court the balls that escape mostly go long, off the rim and behind the goal, so the tallest fence belongs behind the backboard while the sides can be much lower. On tennis and pickleball courts the escapes go long as well, so the baseline ends carry the height and the sidelines are reduced. Volleyball generates less containment demand than either. A multi-sport court has to satisfy whichever sport in the mix is most demanding at each end.

Site geometry modifies all of it. A downhill side needs more height than an uphill side, because a ball clearing a fence on a slope keeps going. A court next to a swimming pool, a street, a steep drop, or a neighbor’s glass door gets height on that side regardless of what the sport would otherwise call for. A court against an existing block wall may need very little fence on that run, since the wall is already doing the job.

Then the constraints push back. Zoning height limits and HOA design guidelines both regulate fencing, and court fencing is tall enough to engage those limits routinely. Establish the maximum permitted height before you design the enclosure, not after.

The systems, and where each one fits

Chain link remains the default for court enclosures because it performs. The variables that matter are the coating, the mesh opening, the wire gauge and the selvage. Galvanized is the economy option and it looks industrial. Vinyl coated in black or dark green costs more, resists corrosion better, and visually recedes so the court behind it reads as open rather than caged. Smaller mesh openings contain smaller balls, which matters for pickleball. Heavier gauge wire holds its shape under repeated ball impact instead of belling out over time. Knuckled selvage at the top is the appropriate finish on a residential court.

Welded wire panel systems use rigid panels rather than woven fabric. They stay flat, look cleaner, resist deformation better, and cost more. They are a good fit where the court is visible from the house and appearance is weighted heavily.

Ornamental steel is chosen for appearance in communities where it is required or preferred. Picket spacing determines whether it contains balls at all, and it frequently does not without a mesh backing, so it is often combined rather than used alone.

Netting systems hang synthetic netting from poles and cables. They are lighter visually, quicker to install, and generally less expensive than a full fence. The tradeoffs are real: netting is more vulnerable to ultraviolet degradation, it moves and flaps in wind, it does not resist a dog or a child, and it has a shorter service life in this climate than a coated steel fence. Netting is a good answer for a single tall run where a fence would look oppressive, and a poor answer as a whole-court enclosure that is expected to last decades.

The structure fails before the fabric does

Most fence failures we are called to look at are not fabric failures. They are post and footing failures.

Posts carry the wind and impact load into the ground, and a court fence is a large surface. Post diameter and wall thickness, line post spacing, footing depth and diameter, and corner and end bracing are the parts of the specification that decide whether the fence is still plumb in ten years. Corners take the highest loads because that is where fabric tension resolves, and undersized corner posts show it first by leaning inward.

Ask whether the top of the fence is a rail or a tension cable. A top rail is stiffer and holds line better against ball impact. A top cable is cheaper and allows more movement. Both are legitimate. Knowing which one you are buying makes two bids comparable.

Footing location deserves attention on a court. Posts set outside the slab in native soil need proper depth and diameter for wind load. Posts set through or beside the slab need sleeves planned before the pour. On a post-tension slab, no footing or anchor can be drilled after the fact without locating the tendons first, so the fence layout has to be settled before concrete day. Fence details missed at that stage are exactly the kind of avoidable rework covered in court construction mistakes to avoid.

Windscreen changes the engineering

This one surprises owners more than anything else on the list.

A fence with open mesh lets wind pass through. Attach windscreen to it and you have built a sail. Wind load on the posts and footings goes up dramatically, and a fence structure designed for an open enclosure can be pushed over or permanently deformed by a strong gust once it is screened.

If windscreen is in the plan, say so before the fence is engineered. The correct response is heavier posts, deeper footings, closer post spacing, or a screen product with a specified openness percentage that lets some air through. Retrofitting windscreen onto an existing fence without checking the structure is a common cause of failure, particularly in Arizona where summer wind events are routine and the same conditions that make shade desirable also stress the enclosure. Our piece on how Arizona heat impacts court performance covers the surface side of that climate problem.

Gates

Gates get specified last and cause problems first.

Make at least one gate wide enough for maintenance equipment. A resurfacing crew, a squeegee cart or a small machine cannot come through a three foot pedestrian gate, and cutting fabric to get equipment in later is a poor outcome. Consider swing direction so a gate does not open into the playing area. Where the court adjoins a pool enclosure, self-closing and self-latching hardware may be required by code rather than optional. Keep the threshold flush so the gate does not catch as the site settles.

What actually drives your spec

Six things, in rough order of influence: the sports being played and where balls escape, site geometry and slope, what is on the other side of each run, zoning and HOA height limits, whether windscreen or shade will be attached, and how visible the court is from the house.

Answer those six and the fence specifies itself. Skip them and you get a uniform tall galvanized rectangle, which costs more than it should on three sides and not enough on the fourth.

We spec fencing as part of the court rather than as an afterthought on multi-game courts, backyard courts and new court construction across Nevada and Arizona.

Frequently asked questions

How tall should sport court fencing be?

It depends on the sport, the site and what sits beyond each side. Height belongs where balls escape, which for most court sports means the ends rather than the sidelines, and it increases on downhill runs or where a pool, street or neighbor’s property sits close. Zoning and HOA guidelines set the upper limit, so confirm those before designing the enclosure.

Is netting a good alternative to fencing?

For a single tall run where a full fence would look heavy, yes. As a complete enclosure expected to last decades, it is a compromise. Netting degrades faster under ultraviolet exposure, moves in wind, and does not keep children or pets off the court. A coated steel fence has a much longer service life in desert conditions.

Do I need a permit for court fencing?

Often, because court fencing is usually taller than standard yard fencing and height thresholds are where permits engage. Requirements vary by jurisdiction, and HOA design guidelines commonly regulate fence height, color and material separately. Confirm both before ordering materials.

Can I add windscreen to an existing court fence?

Only after checking the structure. Windscreen converts an open fence into a solid surface and greatly increases wind load on posts and footings. A fence engineered without screen in mind can lean or fail once it is added. Have the post size, spacing and footings evaluated, or select a screen product with a specified openness percentage.

What is the difference between galvanized and vinyl coated chain link?

Galvanized is bare zinc-coated steel: less expensive and industrial in appearance. Vinyl coated fabric adds a polymer layer, usually black or dark green, which improves corrosion resistance and visually recedes so the enclosure reads as more open. Wire gauge and mesh opening are separate specifications and matter as much as the coating.

If you want the enclosure designed around your lot rather than sold by the linear foot, call Nevada at (702) 883-8386 or Arizona at (480) 878-2292, or request a project quote.
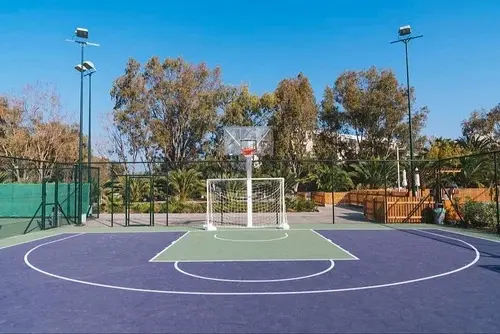
Windscreens and Shade Structures for Desert Courts

A court shade structure is the difference between a court your family uses eleven months a year and one that sits empty from June through September. In Las Vegas and Phoenix that is not a comfort question. It is a utilization question, and utilization is what people actually paid for.

Shade and windscreen get discussed together because both involve fabric on a frame. They solve different problems, they load the structure differently, and buying one when you needed the other is a common and expensive mistake.

Surface temperature is not air temperature

The number on the thermometer understates the problem badly.

A dark acrylic court surface in full sun absorbs solar radiation and runs substantially hotter than the surrounding air. Players feel that as radiant heat coming up at them while the sun comes down, and the effect is worst in the mid afternoon when both the surface has had all day to load up and the sun is still high. Kids playing at ground level get more of it than adults.

Two levers reduce it. The first is color. Lighter surface colors absorb less and run cooler, which is a real consideration in surface selection here and a tradeoff against ball visibility and glare. Our overview of court surface options covers the systems, and the performance side of desert heat is covered in how Arizona heat impacts court performance.

The second lever is blocking the sun before it reaches the surface. That is shade, and shade does two things at once: it lowers the surface temperature under it, and it removes the direct radiant load on the player. The combination is far more effective than either alone.

Shade structure options

Tensioned shade sails are the most common answer on residential courts. Knitted high density polyethylene fabric is stretched between anchor points, and it is specified by shade factor, which is the percentage of solar radiation the fabric blocks. Sails are relatively economical, they look light, and they can be sized to cover a portion of the court or a spectator area rather than the whole surface.

Cantilevered structures support the canopy from one side so there are no posts inside the play area. More steel, more footing, more money, and the right answer where the shaded area has to sit over active playing surface.

Full framed canopies use a steel frame with a fabric or panel roof. These are the most durable and the most expensive, and they behave structurally like a building, which means engineering and permitting.

Solid roofs block sun and rain both, and turn part of the court into covered outdoor space. They also change the lighting condition underneath and reflect ball sound, which matters more than people expect on a pickleball court.

What we do not recommend is relying on trees. Roots heave slabs and lift fencing. Leaves, seed pods and sap stain acrylic and have to be swept constantly. Irrigation for the tree puts water exactly where you least want it near a court edge. Plant trees for the yard, not for the court.

Where to put the shade

Full coverage over an entire court is uncommon on residential projects, because the structure required is large and the visual mass is significant.

Partial coverage is usually the better value. Shading the seating and rest area gives players somewhere to recover between games, which extends the usable session more than most people expect. Shading one end or one side of the court based on afternoon sun angle can make late afternoon play viable without covering everything. Shading a spectator area matters if the court gets used for organized play.

Look at the sun path for your specific orientation before deciding. The side that needs shade in June is not necessarily the side that looks obvious in February.

The engineering people skip

Fabric on a frame is a sail. This is where desert projects fail.

Monsoon season brings microburst events with strong, sudden, directional winds, and a shade structure sees uplift as well as lateral load. Uplift is the failure mode people do not plan for: the wind gets under the canopy and tries to pull the posts out of the ground. Footings sized for the weight of the structure are not automatically sized for uplift, and a structure that has stood through three summers can leave in one gust.

Any permanent shade structure over a court should be engineered, permitted where required, and built with footings designed for both wind load and uplift. Some fabric systems are designed to be taken down seasonally, and where that is the case, taking them down before monsoon season is a maintenance task, not a suggestion.

Two more layout items get missed. Post locations have to sit outside the run of play and outside required clearances, which on a court with tight setbacks can be difficult. And overhead clearance has to account for ball trajectory, since a canopy edge in the flight path of a lob or a jump shot changes the game.

All of it needs to be settled before the slab is poured, because footings, sleeves and anchor points go in with the concrete. Retrofitting a shade structure to a finished court means coring, and on a post-tension slab that means tendon scanning first.

Fabric selection

Knitted polyethylene shade cloth is specified by shade factor and by ultraviolet stabilization. Higher shade factor blocks more sun and also catches more wind. Ultraviolet exposure here is severe, and fabric life varies widely between products, so compare stated warranty terms rather than assuming they are equivalent.

Solid vinyl or PVC membranes block essentially all sun and shed rain, but they carry much higher wind load, they trap heat underneath without ventilation, and they cost more. They make sense on a full framed structure engineered for them and rarely make sense as a retrofit.

Color affects two things: how much heat the fabric itself radiates downward, and what the underside looks like as a visual background. A light underside can create glare. A darker underside gives players a better background for tracking a ball.

Windscreen is a different product

Windscreen attaches to the fence, not overhead, and it solves three problems: wind interfering with ball flight, blowing dust and grit landing on the surface, and visual privacy from the street or the neighbors.

The specification that matters is openness percentage, the fraction of the fabric that is open to airflow. Tighter fabric blocks more wind and dust and takes more load. Looser fabric lets air through and survives better on a fence that was not designed for it. That tradeoff is not optional, and it connects directly to the fence structure itself, which we cover in detail alongside post sizing and footings on any project where screen is planned.

Install it correctly. Attach at close intervals rather than sparsely, use the grommet pattern the manufacturer specifies, tension it evenly, and where a product includes relief vents or wind flaps, do not remove them. In this climate, budget for taking screens down before major wind events and for replacing them well before they shred, because a partially failed screen tears the rest of itself apart quickly.

Darker screen colors give better ball visibility as a background than light ones, which is why so many courts run black or dark green.

If you cannot build shade right now

Choose a lighter surface color at the time of construction, since that decision is free at the front end and expensive later. Shift play to early morning and evening, which is what most people here do anyway. Add lighting so evening play is actually available, which does more for summer utilization than any shade structure. Provide a shaded rest area even if the court itself is open, using an existing patio if you have one.

Be careful with misting systems near a court. Water on an acrylic surface is slippery, and a mister positioned to drift onto the playing area creates a hazard. Mist the seating area, not the court.

We plan shade, windscreen and lighting together with the slab on backyard courts, multi-game courts and new court construction throughout Southern Nevada and the Phoenix area.

Frequently asked questions

Does a shade structure actually cool a court?

It lowers the surface temperature in the shaded area and removes direct radiant load on players, which together make a much larger difference than air temperature alone suggests. Full coverage is uncommon on residential courts, and shading a rest area plus one end based on afternoon sun angle often delivers most of the benefit.

What is the difference between windscreen and shade cloth?

Windscreen mounts vertically on the fence to block wind, dust and sightlines. Shade cloth spans overhead on a frame or tensioned sail to block sun. They are different products with different specifications, different loads and different failure modes, and one does not substitute for the other.

Will a shade structure survive monsoon winds?

Only if it was engineered for them. Microburst events produce sudden directional wind, and the critical load case is uplift, where wind gets under the canopy and pulls at the footings. Have the structure engineered, permitted where required, and built with footings designed for uplift. Seasonal fabric systems should come down before monsoon season.

Can I add shade to a court that is already built?

Yes, but it means new footings, which means coring or excavating adjacent to the slab. On a post-tension slab, nothing gets drilled until the tendons have been located by scanning. Planning post locations and sleeves before the pour is far simpler and less expensive.

What openness percentage should windscreen be?

It depends on what your fence structure can carry. Tighter fabric blocks more wind and dust and transfers much more load into the posts and footings. If the fence was not engineered for screen, a more open product is the safer choice. Have the structure evaluated before selecting the fabric.

If summer heat is the reason your court sits unused, we can look at shade, surface color and lighting together. Call Nevada at (702) 883-8386 or Arizona at (480) 878-2292, or request a project quote.
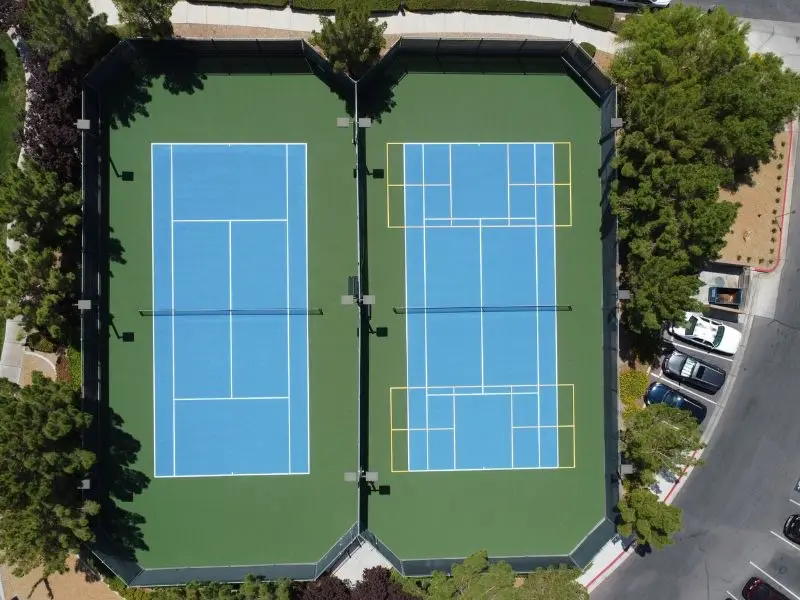
The Court-Building Mistakes That Hurt Homeowners the Most (and How to Avoid Them)

The Court-Building Mistakes That Hurt Homeowners the Most (and How to Avoid Them)

The Court-Building Mistakes That Hurt Homeowners the Most (and How to Avoid Them)

After more than 20 years and 10,000-plus projects across Las Vegas, Henderson, and the Phoenix valley, we’ve built a lot of courts from scratch. We’ve also been called out to fix a lot of courts other people built. And here’s the pattern we see over and over: the mistakes that end up hurting homeowners the most were almost never made on the day someone picked a surface color. They were made weeks earlier, in the dirt, before anyone laid a hand on the acrylic.
That’s the honest version of this list. These aren’t scare stories. Most of the basketball court construction mistakes worth worrying about are quiet ones that look perfectly fine on day one and only show themselves in year three, year five, year eight. The good news is every single one of them is avoidable when you slow down at the start.
So let’s walk through what actually goes wrong, whether you’re planning a backyard basketball court, a pickleball court, or a multi-sport setup for the whole family.

Mistake #1: Skipping a real site and soil evaluation

You’d be surprised how many courts get planned off a rough eyeball of the backyard. Someone paces it out, decides where the hoop goes, and that’s the “site plan.”
Out here, the ground itself is the first thing that lies to you. Desert soils move. They expand and contract with moisture and heat in ways that a slab poured on unstudied dirt simply cannot survive long term, and that movement is the root of a huge share of the cracked courts we get called to look at. A proper evaluation looks at soil type, how the lot drains, where the sun tracks across the yard, and whether the ground needs to be cut, filled, or compacted before anything structural happens. Skip that, and you’re building on a guess.
The fix is boring and it’s everything: look before you dig.

Mistake #2: Cutting corners on the base and sub-base

If there’s one mistake we’d underline twice, it’s this one. The base is the part of your court you will never see again once it’s finished, which is exactly why it’s the part people are tempted to rush.
When the sub-base isn’t compacted properly, it settles unevenly over time. That’s where “birdbaths” come from, those low spots that hold a puddle for two days after it rains and throw off the bounce of the ball. It’s also where a lot of cracking starts, because a surface is only ever as stable as what’s underneath it. Base material matters too. Loose material like pea gravel or sand can feel like a shortcut, but it doesn’t lock together and hold the way a properly compacted crushed-stone sub-base does under years of play.
This is the corner you can’t fix later. You can recoat a faded surface. You can restripe worn lines. You cannot go back and add the compaction and engineering that should have gone under the court without tearing the court out. We go deeper on this in Why Cutting Corners on a Sport Court Backfires, because it deserves its own conversation.

Mistake #3: Getting drainage and slope wrong

Here’s one that catches even careful homeowners: they ask for a “perfectly flat” court. It sounds right. It’s a mistake.
A court needs a very slight, deliberate slope, usually somewhere around one to two percent, so water runs off the surface instead of sitting on it. No slope means water pools, and pooled water is patient. It works into the surface, softens the ground around the edges, and stains the finish. On top of the slope itself, a real drainage plan may call for the surrounding grade to carry water away from the court, and sometimes catch basins or a French drain where the lot needs it.
Water is the enemy of a sport court, and in the desert people underestimate it because it rains so rarely. But when the monsoon does come through Phoenix or a storm rolls over the valley, an inch of rain in an hour finds every drainage mistake you made.

Mistake #4: Underestimating the space you actually need

A court is not just the lines. It’s the lines plus the room around them, and that run-off space is where a lot of backyard projects come up short.
You want clearance so a player chasing a loose ball doesn’t run into a fence, a wall, or the pool equipment. As a rough rule, you’re looking for meaningful buffer on the sides and more behind the baselines, and behind a basketball hoop you want room to rebound and drive without stopping short. A court that technically fits but leaves no breathing room ends up feeling cramped, and it plays cramped too. Pickleball has its own footprint, its own kitchen lines, and its own clearance needs that differ from basketball.
Before you commit to a size, it’s worth understanding how much space you actually need for the sport you have in mind. Sometimes the answer reshapes the whole plan, and better to learn that now than after the concrete is down.

Mistake #5: Ignoring HOA design review and permits

This is the desert-specific one, and it trips up more people than any other item on this list, because it has nothing to do with construction and everything to do with paperwork.
In Clark County, a sport court generally needs a permit through the county’s building department, and in many Las Vegas and Henderson communities the HOA architectural review isn’t a suggestion, it’s a required step with its own standards for setbacks, height, fencing, and lighting. Phoenix-area cities and Maricopa County have their own permitting, and Arizona HOAs run their own design-review processes too. Skip the approval and you’re not just risking a fine. Some associations can require you to tear out or modify a court that went in without a green light, which is about the worst outcome we can imagine for a project this significant.
The good news: a builder who does this every week knows what each jurisdiction and most local HOAs want to see, and can hand you the contractor license, insurance, and timeline details that most improvement-request forms ask for. You don’t have to figure out the bureaucracy alone.

Mistake #6: Choosing the wrong surface for how you’ll actually play

Not every court should be built the same way, and picking a surface based on a photo instead of your actual use is a quiet mistake.
A surface tuned for competitive basketball plays differently than one meant for kids learning, or for a family that wants pickleball three nights a week and hoops on the weekend. Cushioning, grip, and how the surface holds up to our year-round UV all factor in. A coating that isn’t UV-stable can chalk out and fade fast after one full Vegas summer, which is not a mistake you want to discover the hard way. It’s worth walking through the different sport court surface types so the finish matches how your family will really use the court, not just how it looks in a brochure.

Mistake #7: Choosing a contractor without vetting the base work and the track record

We saved this for last because it’s the one that quietly causes most of the others.
When people compare builders, it’s tempting to compare the surface, the colors, the extras you can see. Those are the easy things to look at. The hard thing to look at, and the thing that actually determines whether your court is still going strong in 20 or 30 years, is the part that gets buried: the base, the drainage, the engineering. Ask a prospective builder how they prep and compact the sub-base. Ask how they handle slope and drainage on a desert lot. Ask to see courts they built years ago, not just last month, because a court’s real report card is written by time.
A builder who competes only on what’s visible is telling you where their attention goes. The ones worth hiring will talk your ear off about what’s under the court, because they know that’s where a court is won or lost. Some of the courts we built in Vegas two and three decades ago are still being played on today, and that longevity didn’t come from the top coat.

How we help you avoid all of this

Every mistake on this list traces back to the same thing: rushing past the start. That’s exactly why our process opens with a plan, not a shortcut.
We work in four stages, Design, Build, Play, and Maintain. Design is where the site and soil evaluation, the drainage plan, the space check, and the HOA and permit legwork happen, before a shovel moves. Build is where we engineer the base first and surface it with UV-stable acrylic that’s made for this climate. Play is the part you’re actually here for. And Maintain is the reason we say we’re there for the life of your court, because a court is a long relationship, not a one-time pour. If you’re weighing whether to start, a backyard basketball court installation or a pickleball court build both begin the same way: with a site visit and an honest plan.
The single best way to avoid every mistake above is to have someone who’s done it 10,000 times walk your yard with you before any decisions are locked in.

Frequently asked questions

Can I just pour a court myself to save the hassle? You can pour concrete yourself, but a sport court isn’t really a concrete project, it’s an engineering project. The base prep, compaction, slope, and drainage are where DIY courts most often go wrong, and those are the parts you can’t correct after the fact. Most homeowners who start down the DIY road call us when the first low spots and cracks show up, and by then the fix is harder than doing it right the first time.
Do I need a permit for a backyard court in Las Vegas or Phoenix? In most cases, yes. Clark County and Phoenix-area jurisdictions typically require a permit, and on top of that many HOAs in both markets require architectural approval with their own rules for setbacks, height, fencing, and lighting. It’s very local, so the safest move is to confirm before you plan the build. A builder who works in your area every week can guide you through exactly what your jurisdiction and HOA expect.
How much space do I really need? More than the court markings alone, because you need run-off room around the playing area so it’s safe and comfortable to play on. The exact footprint depends on whether you want a full or half basketball setup, pickleball, or a multi-sport court, and it’s worth checking real dimensions before committing to a size.
Building a court you’ll love in ten years starts long before you pick a color. If you’re thinking about it, let’s walk your yard and put a real plan together. Request a site visit and we’ll take it from there.

Resurface or Replace? How to Tell What Your Court Actually Needs

Resurface or Replace? How to Tell What Your Court Actually Needs

Resurface or Replace? How to Tell What Your Court Actually Needs

Your court doesn’t look the way it used to. The color has gone flat, the lines are ghosting, maybe a crack has opened up near the baseline and you’ve started to wonder whether the whole thing is on its way out. So which is it: a resurface that freshens it back up, or a full replacement that starts over from the ground?
Here’s the good news before we get into the weeds. Most of the time it isn’t a coin flip, and it isn’t a judgment call you need a decade in the trade to make. There’s one question that decides the answer, and once you know how to ask it, you can look at your own court and make a pretty confident guess.
We’ve built and rebuilt courts across Las Vegas, Henderson, and the Phoenix valley for over 20 years, and some of the courts we poured back then are still being played on 30 years later. That kind of longevity comes down to one thing, and it’s the same thing that decides resurface versus replace.

The one question that decides it: is your base still sound?

A sport court is really two things stacked on top of each other. There’s the base, the engineered concrete or asphalt foundation underneath, and there’s the surface, the acrylic coating and striping you actually play on. The surface is what you see. The base is what holds everything together.
Resurfacing only touches the top. We repair the coating, correct the small stuff, and lay down fresh acrylic and lines. Replacing means tearing out the base and starting over, because the foundation itself has failed.
So the whole decision collapses into a single test. If the base is sound and the problems live on the surface, you resurface. If the base is moving, settling, or breaking apart, no coating on earth will save it, and it’s time to replace. Everything below is just how to tell which situation you’re in.

Signs you only need a resurface

These are surface problems. They look worse than they are, and a proper resurface makes them disappear.
  • Faded, chalky color. Year-round desert UV breaks down coatings faster than almost any climate in the country. Color loss is cosmetic, not structural.
  • Worn or ghosting lines. Striping wears off with play and sun. It’s a recoat item, nothing more.
  • A slick or worn playing texture. The acrylic has thinned and lost grip. Resurfacing rebuilds the texture.
  • Minor hairline cracks that aren’t moving. Thin, shallow cracks that stay put season after season can be cleaned, filled, and coated over.
  • Small low spots (birdbaths). After it rains, if a puddle is roughly deeper than a nickel laid flat, that’s a birdbath. Small ones get feathered out and corrected right in the resurfacing process.
If what you’re looking at is on this list, you almost certainly don’t need a rebuild. You need a resurface, and honestly, that’s the outcome we hope for every time we walk a client’s court.

Signs you need a full replacement

These are base problems. They’re the court telling you the foundation underneath has given up, and they don’t respond to surface work.
  • Structural cracks that keep coming back. Wide, deep cracks, or the ones you’ve already filled that reopen anyway, mean the base is shifting. You can fill a moving crack a dozen times and it will reappear a dozen times, because the ground beneath it won’t hold still.
  • Alligator cracking. A web of interconnected cracks that looks like cracked leather is the classic sign of advanced base failure, usually from water getting underneath over a long stretch of time.
  • Settling or heaving. If whole sections have sunk or lifted, the sub-base has moved. Out here that’s often expansive desert soil expanding and contracting under a base that wasn’t engineered for it.
  • Chronic drainage failure. Water that pools and never sheets off, again and again, is a grading and structure problem, not a coating problem.
  • Root intrusion. Trees planted too close send roots under the slab, and once they lift it, there’s no patching your way back.
The through-line here is movement. A surface coating is designed to sit still on something that sits still. The moment the base starts moving underneath it, the surface is fighting a battle it can’t win, and resurfacing just buys you a season before the same cracks push right back through.

How often should a court be resurfaced?

Most courts want a resurface somewhere in the range of every four to eight years, and here in the desert you should plan for the shorter end of that. The heat, the daily temperature swings, and the relentless UV run the clock faster than they would in a mild climate. A court in Henderson takes more punishment from the sun in five years than a court in a cooler part of the country takes in eight.
The point of staying on that rhythm is that resurfacing is protective. A fresh coat isn’t only cosmetic. It seals the surface against water and sun, and water is exactly what eventually finds its way down to the base and starts the failures we just talked about. Skip resurfacing long enough and you shorten the life of the whole court, base included. Stay on top of it and you protect the foundation for decades.

What makes a resurface last, and when it just delays the inevitable

Not every resurface is created equal, and this is where being straight with you matters more than making a sale.
A resurface holds when the base is genuinely sound and the prep is done right: cracks properly repaired first, birdbaths corrected, the surface cleaned and profiled so the new acrylic bonds. Do that over a stable foundation and it can last years and look factory-fresh the whole time.
A resurface fails, or really just stalls, when it’s laid over a base that’s already moving. And that happens more than it should, because a fresh coat can hide a failing foundation for a little while. It looks brand new on the day the crew leaves. Then the base shifts again, the cracks telegraph back through, and you’ve spent time and effort postponing the rebuild you needed all along. We’ve been called out to more than one court like that. It’s a frustrating thing to be on the receiving end of, which is why we’d rather tell you the honest answer up front.

What we check on a site visit before recommending either

You can make a good guess from the list above. Before anything gets recommended for real, though, we come out and look, because the base doesn’t always announce itself from the surface.
On a visit we’re reading the crack pattern (is it shallow and cosmetic, or does it signal movement below), checking for settling or heaving across the slab, running water or a flood test to find birdbaths and see how the court drains, and looking at the edges, the surrounding soil, and anything (like nearby trees) that could be working against the foundation. Then we tell you what the court actually needs. Sometimes that’s a rebuild. Plenty of times it’s “your base is in great shape, let’s just resurface it and keep it that way.” We’d genuinely rather say the second one.
That’s the whole idea behind being there for the life of your court. The goal isn’t to sell you the biggest job. It’s to keep a well-built court playable for as long as possible, and to be honest with you the one time it isn’t worth saving.
If you’re looking at your court right now and you’re not sure which side of the line it’s on, that’s exactly what a site visit is for. We’ll come take a look and tell you straight. For more on why desert courts crack in the first place, and how to spot a structural crack versus a surface one, see our guide on why sport courts crack. When it’s time for the work itself, here’s how our resurfacing and maintenance process works.

FAQ

Can you resurface over cracks? Over shallow hairline cracks that aren’t moving, yes, once they’re properly cleaned and filled first. Over structural cracks caused by a shifting base, no. You can coat over them, but they’ll push back through the new surface within a season, because a coating can’t bridge a base that’s moving underneath it.
Will a resurface actually last? When the base is sound and the prep is done right, absolutely, for years. A resurface’s lifespan is really a reflection of the foundation under it. Solid base, lasting resurface. Failing base, and you’re just delaying a rebuild.
Does a resurface ever just postpone a full rebuild? It can, and that’s the case we want to catch before you spend on it. If the base is already failing, a fresh coat hides the problem for a short while and then the same cracks return. That’s exactly why we look at the base before recommending anything, so you’re not paying to postpone the inevitable.
How do I know if my base has failed? Look for movement: cracks that reopen after being filled, sections that have settled or lifted, alligator-pattern cracking, or drainage that has clearly stopped working. Those point at the structure. Faded color, worn lines, and small low spots point at the surface, and the surface is fixable.

GET A QUOTE

Please Provide Your Contact Information and Project Details