Court Lighting Without the Neighbor Complaints: Fixtures, Shielding and Dark-Sky Rules

Sport court lighting is the single most common reason a finished court becomes a problem with the people next door. The slab does not bother anyone. The fence does not bother anyone. Then someone flips on four unshielded floods at nine at night and the phone calls start.

The good news is that this is an engineering problem with known solutions, and almost all of the fixes are cheaper to specify up front than to retrofit later. What follows is how we approach lighting design on residential and commercial courts across Southern Nevada and Arizona.

Three complaints that get lumped together

When a neighbor says “your lights are too bright,” they usually mean one of three distinct things, and each has a different fix.

Glare is direct light from the source reaching an eye. It is what happens when a bare LED array is visible from a bedroom window. Glare is about the fixture and its optics, not about how much light lands on your court.

Light trespass is light spilling onto property that is not yours: a wash across the neighbor’s patio, a bright patch on their back wall. It is about aiming, cutoff and mounting height.

Sky glow is light escaping upward. Nobody is bothered by it at the fence line, but it is what dark-sky ordinances exist to control, and it is the one a code official cares about.

A system can be perfect on one and terrible on another. Fully shielded fixtures aimed badly still trespass. Well-aimed fixtures with no glare control still blind anyone who looks at them.

The numbers that matter, and the one that does not

Wattage is not a design specification. Neither is raw lumen output. Both describe the fixture. Neither describes what happens on your court.

Two measures do the real work. Illuminance is how much light lands on the playing surface, expressed in foot-candles. Uniformity is the relationship between the brightest and darkest points on that surface, usually expressed as a maximum-to-minimum ratio. A court with high average illuminance and poor uniformity plays worse than a dimmer court that is even, because the eye adapts to the bright zone and the ball disappears in the dark one.

The Illuminating Engineering Society publishes recommended illuminance levels by sport and by level of play. Recreational residential play sits at the low end of those recommendations. Competitive and broadcast levels are far higher, and specifying a competition level for a backyard court is the fastest way to create a nuisance while spending money you did not need to spend. Ask any lighting proposal for a point-by-point photometric plan showing calculated foot-candles on a grid across the court, the uniformity ratio, and the calculated light levels at your property lines. If a vendor cannot produce that, they are guessing.

Fixture selection

The specification items that actually control complaints are these:

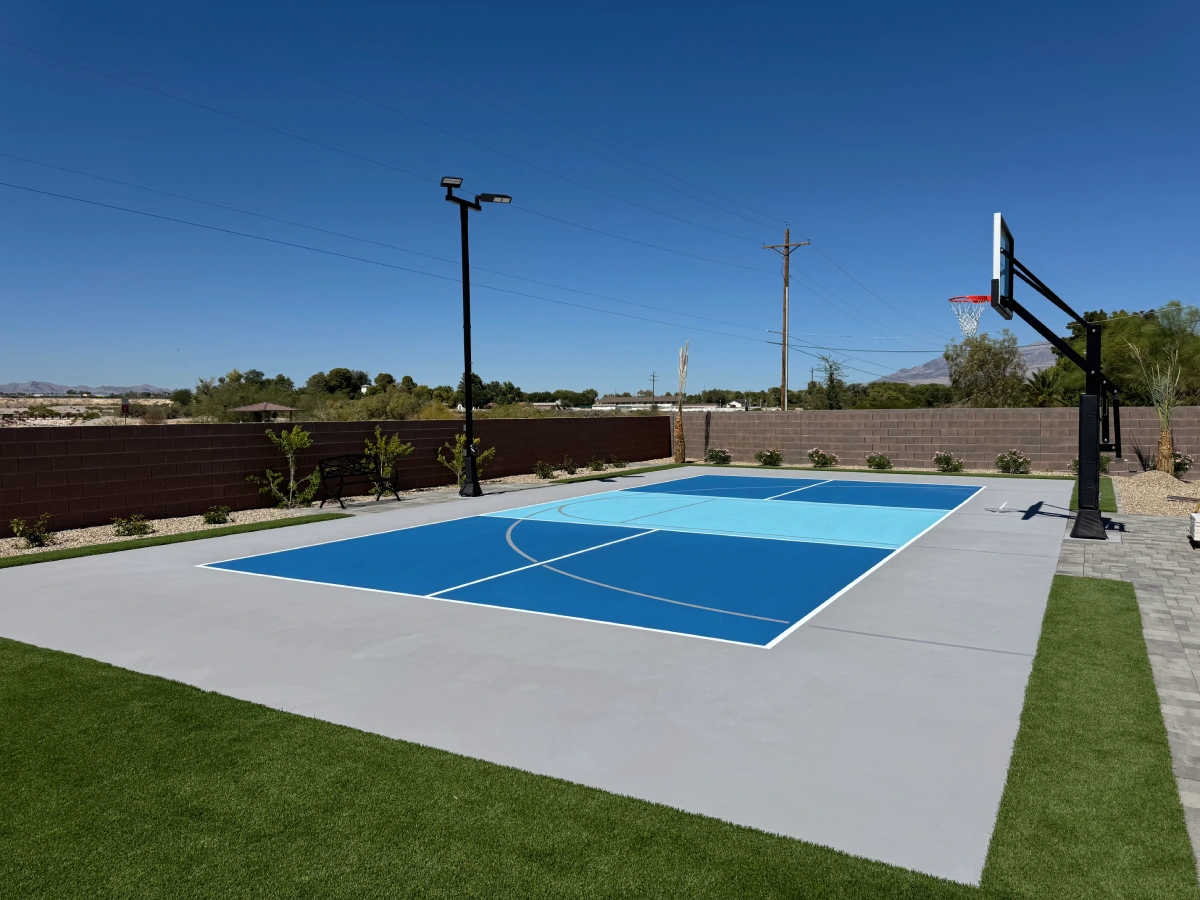
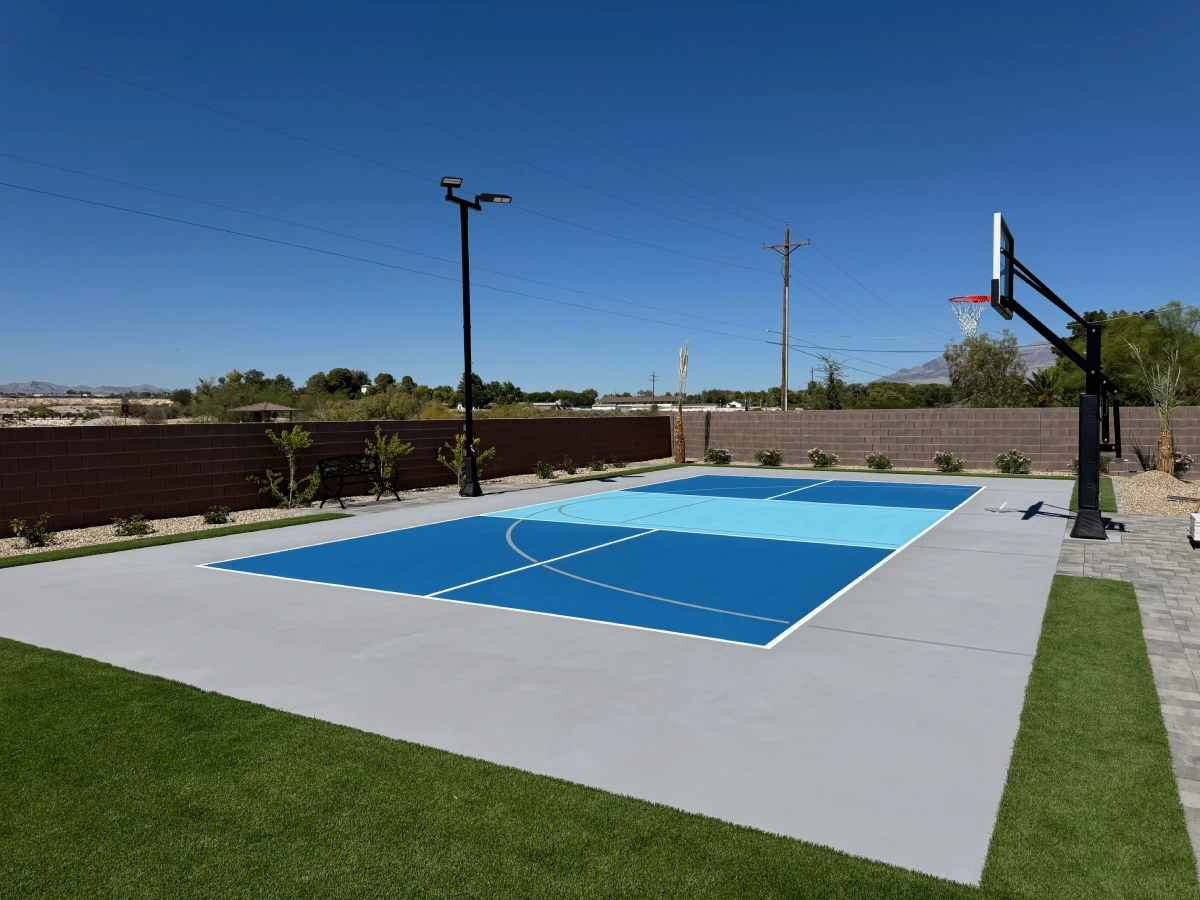
  • Full cutoff optics. A fully shielded fixture emits no light above horizontal. This is the single most important characteristic, and it is also usually the one a code official checks first.
  • BUG rating. The backlight, uplight and glare rating system published by the Illuminating Engineering Society gives you a comparable way to evaluate spill and glare between fixtures. Lower numbers in each category mean less stray light. Ask for the rating rather than the marketing copy.
  • Color temperature. Warmer light, around 3000 kelvin, is less objectionable at night and is what many outdoor lighting ordinances now require. Cool 5000 kelvin light reads as harsher and scatters more in the atmosphere. The playability difference on a residential court is negligible.
  • Asymmetric distribution. A forward-throw optic puts light on the court and keeps it off the area behind the pole. On a tight lot this matters more than any other optical choice.
  • Visors and house-side shields. External accessories that block the specific direction causing a problem. Cheap, effective, and frequently the entire solution on a retrofit.
  • Dimming and zoning. Being able to run at fifty percent for a casual evening game, or to light half the court, prevents a lot of unnecessary output.

Note that none of this is the same conversation as a hoop-mounted light. Product-level lighting attached to a goal, which we cover under basketball hoop lighting systems, solves a different problem and does not involve poles, photometrics or ordinance compliance in the same way.

Mounting height and aiming

There is a counterintuitive rule here: taller poles usually produce fewer complaints, not more.

Light aimed downward from height reaches the court at a steeper angle. That means less of the beam travels horizontally toward a fence line, and the fixture itself sits further outside the normal field of view of someone standing at ground level next door. Short poles force a flatter aiming angle to cover the same court, and flat aiming is what throws light sideways.

The tradeoff is that a taller pole is more visible during the day and more likely to run into height limits in zoning or HOA guidelines. That constraint is real and it belongs in the conversation early, alongside setbacks and fence height.

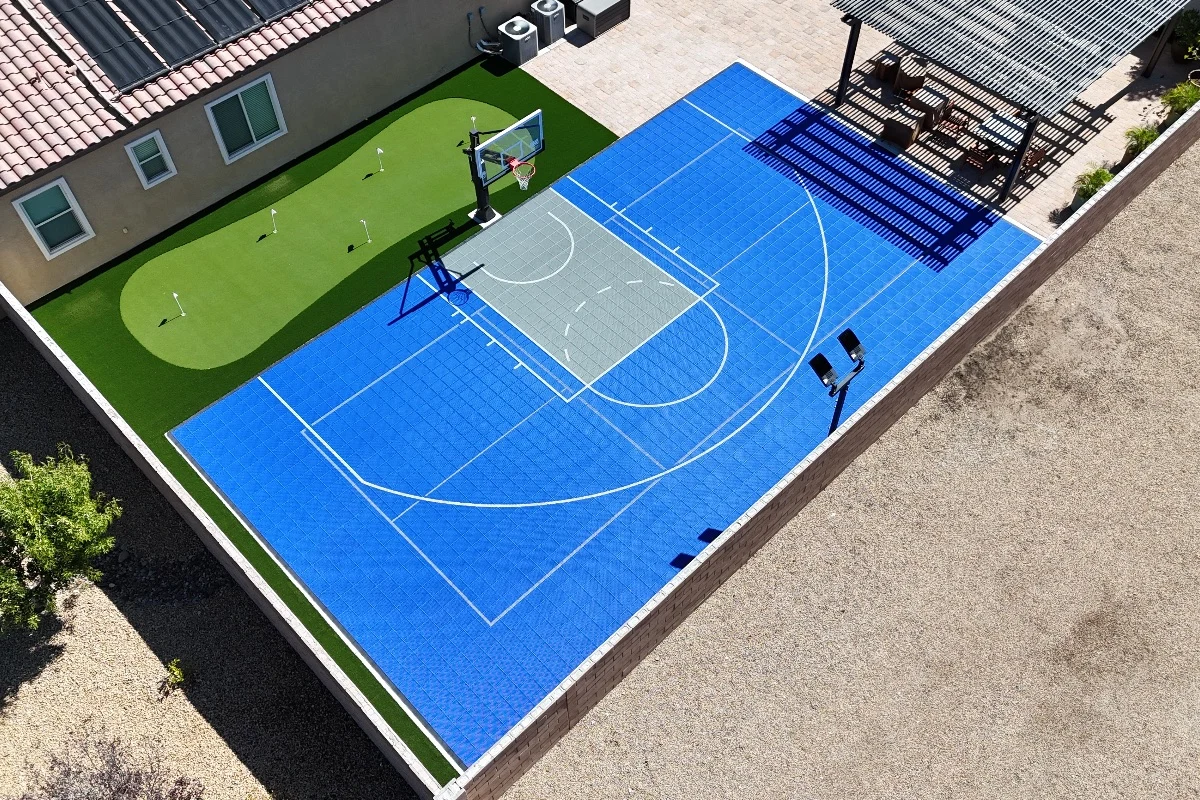
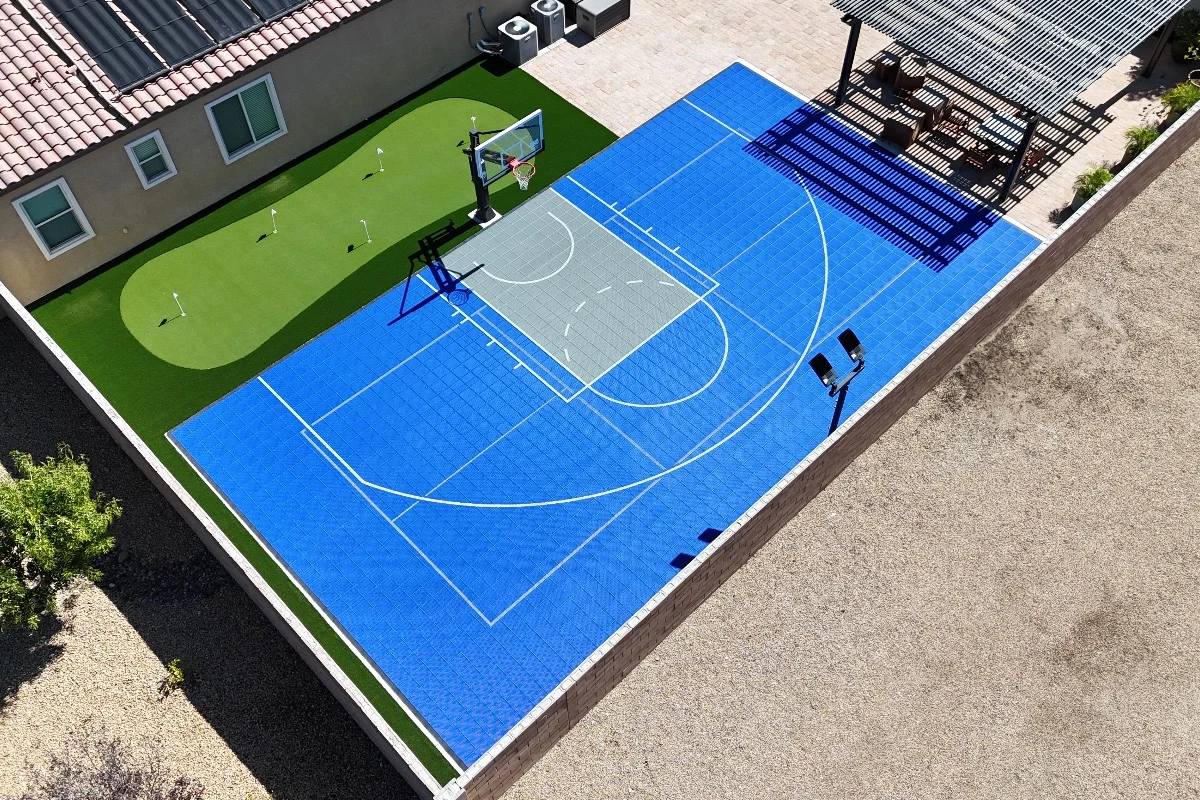
Aiming discipline matters as much as height. Fixtures should be aimed across the court, never outward across a property line. Aiming should be documented and verified at night with a meter, not eyeballed by whoever was on the lift that afternoon. Poles are typically placed along the sidelines rather than behind the baselines for court sports, which keeps the fixtures out of the primary sight lines of play.

Ordinances and dark-sky rules

Outdoor lighting is regulated more than most homeowners expect, and Arizona in particular has a long history of outdoor lighting codes tied to protecting the night sky. Several jurisdictions in both states have adopted standards that address shielding, maximum color temperature, curfew hours, and permitted light levels measured at the property line.

Requirements differ by jurisdiction and they change. Verify your specific rules with your local building or planning department before you buy fixtures, and read your HOA design guidelines separately, since associations frequently impose curfews and fixture restrictions that are stricter than code. This is one of the elements most likely to come back as a condition on an architectural approval.

In practice, communities in the northeast valley and the Scottsdale area tend to be among the more particular about lighting, but assumptions are not a substitute for reading the current guidelines for your community.

Controls prevent more complaints than fixtures do

The most effective complaint prevention is not optical. It is a hard shut-off.

A time clock that kills the lights at a set hour, every night, without depending on anyone remembering, removes the single most common trigger. Neighbors tolerate an hour of evening play. They do not tolerate lights left on until two in the morning because a teenager went inside and forgot.

Build in a manual on with automatic off, so lights can never be left running. Add an astronomical time clock so the schedule tracks sunset through the year. Add zone control so a casual shoot-around does not require the full array. If you told your HOA the lights go off at ten, put that in the controller rather than in your memory.

Fixing a court that already generates complaints

Retrofits are usually cheaper than people fear, because the problem is rarely the amount of light. Start with re-aiming, which costs a lift and an evening. Add house-side shields or visors to the specific fixtures causing spill. Dim the system and see whether play is still comfortable, since many existing courts are substantially over-lit. Swap cool fixtures for a warmer color temperature if the complaint is about harshness. Add a hard curfew on the controller and tell the neighbor you did it.

Replacing poles is the last resort, not the first move. Get a night reading at the property line before and after each change so you have something objective to point at.

We plan lighting alongside layout, fencing and approvals on backyard court projects, on multi-game courts, and on larger new court construction, because retrofitting conduit into a finished slab is exactly the kind of avoidable expense covered in our list of court construction mistakes to avoid.

Frequently asked questions

How bright should a backyard sport court be?

Bright enough to track the ball and even enough that there are no dark zones, which is usually far less light than people assume. The Illuminating Engineering Society publishes recommended levels by sport and level of play, and recreational residential courts sit at the low end. Ask for a point-by-point photometric plan rather than choosing by wattage.

What is a full cutoff light fixture?

A fully shielded fixture that emits no light above the horizontal plane. It keeps light on the court instead of sending it sideways into neighboring property or upward into the sky, and it is commonly the first thing an outdoor lighting ordinance requires.

Will taller light poles bother my neighbors more?

Usually the opposite. Greater mounting height allows a steeper downward aiming angle, which puts less light traveling horizontally toward a fence line and moves the fixture out of the normal line of sight from adjacent yards. The constraint on height is typically zoning or HOA guidelines rather than glare.

Do I need a permit for court lighting?

New circuits, conduit and poles generally require an electrical permit and sometimes a structural review for pole foundations, but requirements vary by jurisdiction. Some areas also apply outdoor lighting standards covering shielding, color temperature and curfew. Confirm with your local building department, and check your HOA design guidelines separately.

Can I fix glare on a court that is already built?

Often yes, and usually without replacing the poles. Re-aiming, adding house-side shields or visors, dimming an over-lit system, and switching to a warmer color temperature all address glare and spill directly. Adding an automatic shut-off resolves the timing complaints that shielding cannot.

If you are planning lighting for a new court or trying to solve complaints on an existing one, call us in Nevada at (702) 883-8386 or Arizona at (480) 878-2292, or request a project quote.
The Court-Building Mistakes That Hurt Homeowners the Most (and How to Avoid Them)

The Court-Building Mistakes That Hurt Homeowners the Most (and How to Avoid Them)

The Court-Building Mistakes That Hurt Homeowners the Most (and How to Avoid Them)

After more than 20 years and 10,000-plus projects across Las Vegas, Henderson, and the Phoenix valley, we’ve built a lot of courts from scratch. We’ve also been called out to fix a lot of courts other people built. And here’s the pattern we see over and over: the mistakes that end up hurting homeowners the most were almost never made on the day someone picked a surface color. They were made weeks earlier, in the dirt, before anyone laid a hand on the acrylic.
That’s the honest version of this list. These aren’t scare stories. Most of the basketball court construction mistakes worth worrying about are quiet ones that look perfectly fine on day one and only show themselves in year three, year five, year eight. The good news is every single one of them is avoidable when you slow down at the start.
So let’s walk through what actually goes wrong, whether you’re planning a backyard basketball court, a pickleball court, or a multi-sport setup for the whole family.

Mistake #1: Skipping a real site and soil evaluation

You’d be surprised how many courts get planned off a rough eyeball of the backyard. Someone paces it out, decides where the hoop goes, and that’s the “site plan.”
Out here, the ground itself is the first thing that lies to you. Desert soils move. They expand and contract with moisture and heat in ways that a slab poured on unstudied dirt simply cannot survive long term, and that movement is the root of a huge share of the cracked courts we get called to look at. A proper evaluation looks at soil type, how the lot drains, where the sun tracks across the yard, and whether the ground needs to be cut, filled, or compacted before anything structural happens. Skip that, and you’re building on a guess.
The fix is boring and it’s everything: look before you dig.

Mistake #2: Cutting corners on the base and sub-base

If there’s one mistake we’d underline twice, it’s this one. The base is the part of your court you will never see again once it’s finished, which is exactly why it’s the part people are tempted to rush.
When the sub-base isn’t compacted properly, it settles unevenly over time. That’s where “birdbaths” come from, those low spots that hold a puddle for two days after it rains and throw off the bounce of the ball. It’s also where a lot of cracking starts, because a surface is only ever as stable as what’s underneath it. Base material matters too. Loose material like pea gravel or sand can feel like a shortcut, but it doesn’t lock together and hold the way a properly compacted crushed-stone sub-base does under years of play.
This is the corner you can’t fix later. You can recoat a faded surface. You can restripe worn lines. You cannot go back and add the compaction and engineering that should have gone under the court without tearing the court out. We go deeper on this in Why Cutting Corners on a Sport Court Backfires, because it deserves its own conversation.

Mistake #3: Getting drainage and slope wrong

Here’s one that catches even careful homeowners: they ask for a “perfectly flat” court. It sounds right. It’s a mistake.
A court needs a very slight, deliberate slope, usually somewhere around one to two percent, so water runs off the surface instead of sitting on it. No slope means water pools, and pooled water is patient. It works into the surface, softens the ground around the edges, and stains the finish. On top of the slope itself, a real drainage plan may call for the surrounding grade to carry water away from the court, and sometimes catch basins or a French drain where the lot needs it.
Water is the enemy of a sport court, and in the desert people underestimate it because it rains so rarely. But when the monsoon does come through Phoenix or a storm rolls over the valley, an inch of rain in an hour finds every drainage mistake you made.

Mistake #4: Underestimating the space you actually need

A court is not just the lines. It’s the lines plus the room around them, and that run-off space is where a lot of backyard projects come up short.
You want clearance so a player chasing a loose ball doesn’t run into a fence, a wall, or the pool equipment. As a rough rule, you’re looking for meaningful buffer on the sides and more behind the baselines, and behind a basketball hoop you want room to rebound and drive without stopping short. A court that technically fits but leaves no breathing room ends up feeling cramped, and it plays cramped too. Pickleball has its own footprint, its own kitchen lines, and its own clearance needs that differ from basketball.
Before you commit to a size, it’s worth understanding how much space you actually need for the sport you have in mind. Sometimes the answer reshapes the whole plan, and better to learn that now than after the concrete is down.

Mistake #5: Ignoring HOA design review and permits

This is the desert-specific one, and it trips up more people than any other item on this list, because it has nothing to do with construction and everything to do with paperwork.
In Clark County, a sport court generally needs a permit through the county’s building department, and in many Las Vegas and Henderson communities the HOA architectural review isn’t a suggestion, it’s a required step with its own standards for setbacks, height, fencing, and lighting. Phoenix-area cities and Maricopa County have their own permitting, and Arizona HOAs run their own design-review processes too. Skip the approval and you’re not just risking a fine. Some associations can require you to tear out or modify a court that went in without a green light, which is about the worst outcome we can imagine for a project this significant.
The good news: a builder who does this every week knows what each jurisdiction and most local HOAs want to see, and can hand you the contractor license, insurance, and timeline details that most improvement-request forms ask for. You don’t have to figure out the bureaucracy alone.

Mistake #6: Choosing the wrong surface for how you’ll actually play

Not every court should be built the same way, and picking a surface based on a photo instead of your actual use is a quiet mistake.
A surface tuned for competitive basketball plays differently than one meant for kids learning, or for a family that wants pickleball three nights a week and hoops on the weekend. Cushioning, grip, and how the surface holds up to our year-round UV all factor in. A coating that isn’t UV-stable can chalk out and fade fast after one full Vegas summer, which is not a mistake you want to discover the hard way. It’s worth walking through the different sport court surface types so the finish matches how your family will really use the court, not just how it looks in a brochure.

Mistake #7: Choosing a contractor without vetting the base work and the track record

We saved this for last because it’s the one that quietly causes most of the others.
When people compare builders, it’s tempting to compare the surface, the colors, the extras you can see. Those are the easy things to look at. The hard thing to look at, and the thing that actually determines whether your court is still going strong in 20 or 30 years, is the part that gets buried: the base, the drainage, the engineering. Ask a prospective builder how they prep and compact the sub-base. Ask how they handle slope and drainage on a desert lot. Ask to see courts they built years ago, not just last month, because a court’s real report card is written by time.
A builder who competes only on what’s visible is telling you where their attention goes. The ones worth hiring will talk your ear off about what’s under the court, because they know that’s where a court is won or lost. Some of the courts we built in Vegas two and three decades ago are still being played on today, and that longevity didn’t come from the top coat.

How we help you avoid all of this

Every mistake on this list traces back to the same thing: rushing past the start. That’s exactly why our process opens with a plan, not a shortcut.
We work in four stages, Design, Build, Play, and Maintain. Design is where the site and soil evaluation, the drainage plan, the space check, and the HOA and permit legwork happen, before a shovel moves. Build is where we engineer the base first and surface it with UV-stable acrylic that’s made for this climate. Play is the part you’re actually here for. And Maintain is the reason we say we’re there for the life of your court, because a court is a long relationship, not a one-time pour. If you’re weighing whether to start, a backyard basketball court installation or a pickleball court build both begin the same way: with a site visit and an honest plan.
The single best way to avoid every mistake above is to have someone who’s done it 10,000 times walk your yard with you before any decisions are locked in.

Frequently asked questions

Can I just pour a court myself to save the hassle? You can pour concrete yourself, but a sport court isn’t really a concrete project, it’s an engineering project. The base prep, compaction, slope, and drainage are where DIY courts most often go wrong, and those are the parts you can’t correct after the fact. Most homeowners who start down the DIY road call us when the first low spots and cracks show up, and by then the fix is harder than doing it right the first time.
Do I need a permit for a backyard court in Las Vegas or Phoenix? In most cases, yes. Clark County and Phoenix-area jurisdictions typically require a permit, and on top of that many HOAs in both markets require architectural approval with their own rules for setbacks, height, fencing, and lighting. It’s very local, so the safest move is to confirm before you plan the build. A builder who works in your area every week can guide you through exactly what your jurisdiction and HOA expect.
How much space do I really need? More than the court markings alone, because you need run-off room around the playing area so it’s safe and comfortable to play on. The exact footprint depends on whether you want a full or half basketball setup, pickleball, or a multi-sport court, and it’s worth checking real dimensions before committing to a size.
Building a court you’ll love in ten years starts long before you pick a color. If you’re thinking about it, let’s walk your yard and put a real plan together. Request a site visit and we’ll take it from there.

Basketball Court Construction Company Serving Las Vegas & Phoenix

Basketball Court Construction Company Serving Las Vegas & Phoenix - Legendary Sports

Basketball Court Construction Company Serving Las Vegas & Phoenix

Legendary Sport Construction is a basketball court construction company built around one standard: courts that are engineered correctly from the ground up and finished to play true for decades. We design and build backyard courts, HOA and community courts, school and athletic facility courts, and commercial basketball installations across Las Vegas, Nevada and the Phoenix, Arizona metro.
 
If you’re comparing basketball court construction companies, the difference that matters most isn’t the color of the paint. It’s what’s under it: the base, the drainage, the surface system, and the crew installing it.
 

Why Property Owners Choose Legendary Sport Construction

 
Engineering-first approach. Every project starts with a site evaluation covering soil conditions, drainage, slope, and orientation. In the desert Southwest, courts that aren’t graded and based correctly fail early, regardless of how good the paint job looks on day one.
 
Full-service builds. We handle excavation, base preparation, concrete or asphalt paving, acrylic surfacing, line striping, hoop systems, fencing, and court lighting as one coordinated project, not a string of subcontractors you have to manage yourself.
 
Regional experience. Building a basketball court in a high-UV, high-heat climate requires different surface specifications than building one in a milder region. We use coating systems and base designs proven to hold up against Las Vegas and Phoenix conditions specifically.
 
Transparent scope and pricing. You get a defined scope, a realistic timeline, and a quote that reflects the actual work, not a lowball number that turns into change orders once the project starts.
 

Our Basketball Court Construction Services

 
New court construction for backyards, HOAs, churches, schools, and commercial properties, sized and laid out to regulation dimensions or customized to your space.
 
Court resurfacing and recoating for existing courts showing cracking, fading, or surface breakdown, extending the life of the court without a full rebuild.
 
Surface system selection, matching acrylic, cushioned acrylic, or modular tile systems to your usage, budget, and site conditions.
 
Accessories and lighting, including in-ground and portable hoop systems, court fencing, and LED lighting packages for evening play.
 
Multi-sport conversions, striping courts for basketball alongside pickleball or volleyball lines on the same pad.
 

Our Process

 
  1. Consultation and site visit — we assess your space, discuss your goals, and talk through surface and layout options.
  2. Design and proposal — you get a detailed scope, material specifications, and pricing before any work begins.
  3. Base construction — excavation, compaction, and concrete or asphalt installation to the correct slope and thickness.
  4. Surfacing and striping — acrylic color coats or modular tile installation, followed by precise court line painting.
  5. Accessories and final walkthrough — hoops, lighting, and fencing installed and tested, with a final walkthrough before we call the project complete.
 

Built for the Desert Southwest

 
Las Vegas and Phoenix present some of the toughest conditions in the country for outdoor sports surfaces: intense UV, surface temperatures that can exceed 140°F, and wide seasonal temperature swings that stress concrete and coatings. Our surface systems and base designs are chosen specifically to handle that environment, which is why courts we build hold their color and structural integrity for years longer than generic installations.
 

FAQ

 
What does a basketball court construction company actually do?
A full-service company like Legendary Sport Construction handles the entire build: site evaluation, excavation, base construction, surfacing, striping, hoop and lighting installation, and any fencing or accessories, coordinated as a single project.
 
How much does it cost to build a basketball court?
Costs vary based on size, surface system, site conditions, and accessories. Our team provides a detailed, itemized quote after a site visit so you know exactly what you’re paying for. See our full basketball court construction cost breakdown for typical ranges.
 
Do you build both residential and commercial basketball courts?
Yes. We build backyard courts, HOA and community courts, church and school courts, and commercial or municipal installations.
 
Can you convert an existing concrete pad or driveway into a basketball court?
In many cases, yes, provided the existing slab is structurally sound and properly sloped. We evaluate the pad during our site visit.
 
Do you serve areas outside Las Vegas and Phoenix?
We primarily serve the Las Vegas metro and are expanding service into the Phoenix, AZ metro. Contact us to confirm coverage for your location.
 
How long will a new basketball court last?
With proper installation and periodic recoating, a well-built acrylic basketball court typically lasts 15-20+ years before major structural work is needed.
 
This hub page links to our supporting basketball guides (cost, surface options, hoops and lighting) and to the relevant service-area page for your city. Ready to start your project? Get a quote from Legendary Sport Construction today.
 

Basketball Hoop and Lighting Systems: What to Know Before You Buy

Basketball Hoop and Lighting Systems: What to Know Before You Buy

Basketball Hoop and Lighting Systems: What to Know Before You Buy

A basketball court is only as good as the hoop it’s built around, and in Las Vegas and Phoenix, that hoop often needs to work well after dark too. This guide covers the hoop systems and lighting options that turn a good court into a court that gets used every day, from casual backyard shooting to serious training sessions.
 

Basketball Hoop System Options

 
Fixed-height in-ground systems are anchored directly into a concrete footing and set at regulation height (10 feet). They’re the most affordable permanent option and the standard choice for most backyard and community courts where height adjustment isn’t needed.
 
Adjustable in-ground systems allow the rim height to be raised or lowered, which matters for households with younger kids who aren’t ready for a regulation hoop, or programs that train multiple age groups on the same court. These systems cost more but add flexibility that fixed hoops can’t match.
 
Breakaway rims are worth the upgrade for any court that will see real gameplay. A breakaway rim flexes under the weight of a hang or dunk and springs back, protecting both the rim and the backboard from the kind of damage that snaps a rigid rim clean off its mount.
 
Portable/wheeled systems are an option for temporary or multi-use spaces, but they trade stability and durability for mobility. For a permanent court, an anchored in-ground system is almost always the better long-term investment.
 
Backboard material matters too. Tempered glass backboards give the truest rebound and are standard for serious play. Acrylic and polycarbonate backboards are more affordable and more impact-resistant, which can make sense for high-traffic community courts.
 

Anchoring and Footing

 
Regardless of which hoop system you choose, the footing underneath it is what keeps it standing through wind, impact, and years of use. We pour dedicated concrete footings sized and reinforced for the specific hoop system being installed, not a generic post hole. Skipping proper anchoring is one of the most common (and most dangerous) shortcuts taken on budget installations.
 

Court Lighting Systems

 
Court lighting extends usable hours dramatically, which matters most in a region where daytime summer heat can make midday play uncomfortable and evening play the preferred time to use the court.
 
LED sports lighting is the standard today over older metal halide fixtures. LEDs use less energy, produce more consistent light without the flicker or warm-up delay of older bulbs, and last significantly longer before needing replacement.
 
Pole-mounted vs. wall-mounted fixtures. Pole-mounted lighting is typical for standalone courts and gives the most even coverage across the full playing surface. Wall-mounted fixtures can work for courts adjacent to a structure but may create more shadow and uneven lighting depending on placement.
 
Lumens and coverage. The number and placement of fixtures should be based on court size and desired brightness level, casual backyard play needs less intensity than a court intended for serious evening training or hosting games.
 
Glare control. Fixture angle and shielding matter, especially for residential courts near neighboring properties, to avoid light spilling where it isn’t wanted.
 

Putting It Together

 
The right hoop and lighting package depends on how the court will actually be used. A casual backyard half-court for family play doesn’t need the same specification as a court built for a training facility or HOA amenity space that sees daily, high-intensity use. We help clients match the hoop system, backboard type, and lighting package to actual usage and budget, rather than defaulting to either the cheapest or most expensive option available.
 

FAQ

 
Should I choose a fixed-height or adjustable basketball hoop?
Fixed-height regulation hoops are best for most serious play and cost less. Adjustable systems are worth the extra cost if younger players or mixed age groups will use the court.
 
Are breakaway rims worth the extra cost?
Yes, for any court that will see real gameplay including dunks or hangs. Breakaway rims protect the rim and backboard from damage that a rigid rim can’t absorb.
 
What type of backboard lasts longest outdoors?
Tempered glass gives the best rebound but is more exposed to impact damage. Acrylic and polycarbonate backboards are more impact-resistant and often preferred for high-traffic community courts.
 
Is LED lighting worth the upgrade over older lighting systems?
Yes. LED sports lighting uses less energy, lasts longer, and provides more consistent, flicker-free illumination than older metal halide systems.
 
How many light fixtures does a backyard court need?
It depends on court size and desired brightness. A half-court for casual evening play typically needs fewer fixtures than a full court intended for serious training or hosting games. We size lighting packages during your site visit.
 
Can hoop and lighting systems be added to an existing court?
Yes, both can be retrofitted onto an existing court as long as the base can support proper anchoring or fixture mounting.
 
  1. This page is part of our Basketball Court Construction hub. See our guides on basketball court installation and surface options, or find your local service-area page. Ready to plan your hoop and lighting setup? Get a quote from Legendary Sport Construction today.

How Much Does It Cost to Build a Basketball Court?

How Much Does It Cost to Build a Basketball Court?

How Much Does It Cost to Build a Basketball Court?


If you’re just starting to research building a basketball court, you probably want a straight answer before diving into design details. Here’s the quick, honest breakdown of what actually drives the cost, so you can gauge whether this project fits your budget before going further.


The Short Answer


There isn’t a single number that applies to every basketball court, because cost depends on size, site conditions, and the materials you choose. But the pattern is consistent: size and base work drive most of the cost, while surface choice and accessories fine-tune the total.


What Actually Changes the Price


Half-court vs. full court. A half-court for backyard pickup games uses a fraction of the material a full regulation court requires, and that difference shows up directly in base and surfacing costs.


Your existing site. If you already have a flat, accessible concrete pad or driveway in good condition, you may only need a resurfacing project rather than a full new build, which costs significantly less. A sloped yard, poor drainage, or difficult access adds cost to any project.


Concrete vs. asphalt base. Concrete costs more to install but tends to last longer with less frequent resurfacing. Asphalt costs less upfront and still performs well when built correctly, though it typically needs attention sooner.


Surface coating. Standard acrylic coating is the most budget-friendly way to get a real, professional-feeling court. Cushioned acrylic adds cost but adds comfort, especially for daily use.


Hoop system. A fixed-height, in-ground hoop costs less than an adjustable system, and adding a breakaway rim (recommended for any real gameplay) adds a modest amount more.


Extras. Lighting, fencing, and windscreens are add-ons priced separately from the core court build, and they’re worth considering even if you don’t include them on day one, since they can often be added later.


A Realistic Way to Think About Budget


Rather than anchoring on a single number pulled from a national average that may not reflect your actual site, the more useful exercise is this: decide on court size first (half-court is usually plenty for most families), assess whether you have a usable existing pad, and then get a real quote based on your property. That’s the only way to get numbers that actually apply to your project instead of a rough estimate that could be off by a wide margin in either direction.


The One Thing Worth Spending On


If you’re tempted to cut costs somewhere, don’t cut the base. A cheaper, poorly compacted base is the single most common reason backyard courts crack and need expensive rework within just a few years. Spending appropriately on excavation and base prep protects the rest of your investment.


FAQ


Is a half-court cheaper than a full basketball court?
Yes, significantly. A half-court uses less base material, surfacing, and striping, making it the more budget-friendly option for most backyard projects.


Can I save money by resurfacing an existing driveway instead of building new?
Often yes, if your existing pad is structurally sound and properly sloped, resurfacing costs considerably less than a brand-new build.


What’s the cheapest way to get a real, playable basketball court?
A half-court with a standard acrylic coating system and a fixed-height hoop is typically the most budget-friendly way to get a genuinely good playing surface.


Should I skip the breakaway rim to save money?
We don’t recommend it if the court will see real gameplay. Breakaway rims protect the rim and backboard from damage that a rigid rim can’t absorb, and the added cost is modest relative to the protection it provides.


How do I get a real price instead of a rough estimate?
The only reliable way is a site visit and itemized quote, since your specific site conditions significantly affect final pricing.


Is it worth adding lighting now or can I add it later?
Lighting can often be added after the initial build, so it’s reasonable to start with the core court and add lighting later if budget is tight now.


For the full cost breakdown across every sport and project type, see our comprehensive cost to build a sport court pillar guide, or our basketball-specific cost breakdown. Ready for a real number? Get a quote from Legendary Sport Construction today.

Backyard Basketball Court Construction in Las Vegas

Pickleball is booming—and Las Vegas pickleball is leading the charge. From backyard courts to resort facilities, more players are discovering the fast-paced fun of the sport. But with growth comes one of the most common challenges: pickleball noise. So, how do you reduce pickleball noise without sacrificing playability? At Legendary Sports Construction, we offer two proven solutions: Pickleball Glass and cushioned pickleball court surfaces.

Basketball Court Installation: Outdoor vs Indoor, Acrylic vs Specialty Surfaces

Basketball Court Installation

Basketball Court Installation: Outdoor vs Indoor, Acrylic vs Specialty Surfaces

Building a basketball court is a bigger decision than picking a hoop and pouring concrete. The surface, the base, the drainage plan, and the finish system all determine whether you get a court that plays true for twenty years or one that cracks, fades, and needs rework in five. Legendary Sport Construction has installed basketball courts across Las Vegas and the Phoenix Valley for homeowners, HOAs, schools, and commercial property owners who want a court built once and built right.
 

Outdoor vs Indoor Basketball Court Installation

 
The core engineering question on every project is where the court lives.
 
Outdoor courts have to survive direct sun, temperature swings, and in the Southwest, UV exposure that is more intense than almost anywhere else in the country. That means the base (typically compacted aggregate under a concrete or asphalt pad), the crack-resistant membrane, and the surface coating all need to be rated for exterior use. Drainage and slope also matter more outdoors than indoors: a properly built outdoor court is sloped at a slight, even grade so water sheets off instead of pooling and undermining the surface.
 
Indoor courts (gyms, converted warehouses, home sport rooms) don’t face weather, but they carry different requirements: subfloor moisture control, sound and shock absorption, and often a different surface category altogether, such as modular tile or hardwood-style synthetic systems instead of acrylic coatings. Indoor installs also need to account for HVAC and humidity, since a slab that never gets exposed to sun can still trap moisture that damages a coating from underneath.
 
Both settings need a properly prepared base. This is where most court failures actually start. If the sub-base isn’t compacted correctly or the concrete/asphalt pad isn’t cured and finished to spec, no surface system on top of it will hold up. We treat base prep as the most important step in the build, not a formality before the “real” work begins.
 

Acrylic vs Specialty Surface Systems

 
Once the pad is ready, the surface system is the next major decision.
 
Acrylic surfacing is the standard for most outdoor basketball courts in our region, and for good reason. A multi-coat acrylic system (typically a resurfacer coat to fill minor texture and cracks, followed by color coats and line striping) creates a surface that is UV-stable, textured for consistent ball bounce and traction, and available in essentially any color scheme. Acrylic systems are also the most cost-effective way to get a professional, tournament-grade playing surface, and they are straightforward to recoat every several years rather than replace.
 
Specialty surfaces cover a range of alternatives:
 
  • Modular tile systems (interlocking polypropylene tiles) are popular for driveways, garages, and situations where you want a surface that can be installed over existing concrete without extensive prep, or even removed and relocated later. They offer excellent shock absorption and drainage through their perforated design.
  • Cushioned acrylic systems add a rubberized layer beneath the color coats for extra joint protection, which matters for high-usage courts or players concerned about long-term impact on knees and ankles.
  • Synthetic hardwood-look systems are used mostly indoors where the goal is to replicate the look and feel of a gymnasium floor without the maintenance demands of real hardwood.
 
The right choice depends on usage (backyard pickup games vs. daily training), budget, climate exposure, and whether the court needs to double as a pickleball or multi-sport surface with different striping.
 

What Goes Into a Professional Installation

 
A basketball court installation is not one trade, it’s a sequence:
 
  1. Site evaluation and layout — confirming dimensions, orientation (minimizing glare for players shooting into the sun), and grading.
  2. Excavation and base prep — compacting the sub-base to the density needed to prevent future settling or cracking.
  3. Concrete or asphalt pad installation — poured and finished to the correct slope, with control joints placed to manage natural cracking.
  4. Surface system application — resurfacer, color coats, and cushioning if specified, applied in the correct number of coats and cure times.
  5. Line striping and graphics — court lines, logos, or multi-sport overlays painted to regulation spacing.
  6. Accessories — hoop systems, anchoring, and lighting installed and tested.
 
Skipping or rushing any one of these steps is the most common reason a “new” court needs major repair inside a few years.
 

Why Professional Installation Matters

 
DIY and low-bid court installations tend to fail in predictable ways: inadequate base compaction leads to cracking, incorrect slope leads to standing water and surface delamination, and cheap acrylic coatings chalk and fade within a season or two under desert sun. A properly engineered court, by contrast, is built to handle decades of use with routine maintenance rather than repeated rebuilds.
 
Legendary Sport Construction builds every court, whether it’s a single backyard half-court or a full commercial installation, on the same standard: correct base, correct surface system, correct slope, and a finish that plays true from the first game to the thousandth.
 

FAQ

 
How long does a basketball court installation take?
Most residential courts take one to three weeks from excavation to finished striping, depending on size, base conditions, and surface system. Commercial or multi-court projects take longer.
 
Is acrylic or modular tile better for a backyard court?
Acrylic is generally the better choice when you want a permanent, tournament-quality surface with maximum color and design flexibility. Modular tile is a strong option when you need faster installation, easier future removal, or a surface that can go directly over existing concrete with minimal prep.
 
Can an existing driveway or slab be converted into a basketball court?
Often yes, if the existing concrete is structurally sound and properly sloped. We evaluate the pad first, since a resurfacing system only performs as well as what’s underneath it.
 
How often does an acrylic court need to be recoated?
Typically every four to seven years for heavily used courts, depending on sun exposure and traffic. Recoating is far less expensive than a full rebuild.
 
Do outdoor basketball courts in Las Vegas or Phoenix need special UV-resistant coatings?
Yes. Standard interior paints and generic coatings break down quickly under intense desert UV. We use acrylic systems specifically formulated for sustained sun exposure and high surface temperatures.
 
This page links to the Basketball Court Construction hub and the relevant service-area page for your city. Ready to plan your court? Get a quote from Legendary Sport Construction today.
 

Sport Court Resurfacing & Maintenance

Sport Court Resurfacing & Maintenance

Sport Court Resurfacing & Maintenance

A well-built sport court is a long-term asset, but only if it’s maintained correctly along the way. Legendary Sport Construction provides resurfacing and maintenance services for basketball, pickleball, tennis, and volleyball courts across Las Vegas and Phoenix, helping property owners protect their investment and avoid premature, costly rebuilds.
 

Signs Your Court Needs Resurfacing

 
  • Fading or chalking color, a sign the acrylic coating’s UV protection is breaking down.
  • Hairline or spreading cracks, which allow water intrusion that can damage the base beneath the surface.
  • Inconsistent bounce or traction, indicating uneven wear across the playing surface.
  • Standing water after rain, which points to a drainage or slope issue that needs to be addressed before resurfacing.
  • Faded or hard-to-see line striping, which affects both play accuracy and the court’s overall appearance.
 

What Our Resurfacing Service Includes

 
  1. Full surface assessment, checking base integrity, drainage, and the extent of cracking before recommending a scope of work.
  2. Crack repair, using flexible fillers designed to move with the base rather than re-crack quickly.
  3. Resurfacer coat application, restoring a uniform surface texture across the full court.
  4. Fresh color coats, applied in your existing colors or a new palette if you’re ready for a refresh.
  5. New line striping, painted to precise regulation spacing in durable, UV-resistant paint.
 

Ongoing Maintenance Recommendations

 
Routine cleaning. Regularly sweeping debris and periodically rinsing the surface prevents dirt and organic material from degrading the coating and creating slip hazards.
 
Prompt crack attention. Small cracks should be treated quickly, before they widen and allow water to undermine the base beneath the coating.
 
Drainage checks. Periodically confirming that water sheets off the court properly after rain helps catch developing slope or drainage issues before they cause real damage.
 
Scheduled recoating. Most acrylic courts benefit from a full recoat every four to seven years, depending on usage intensity and sun exposure. Recoating on a proactive schedule, rather than waiting until damage is severe, keeps costs lower and the court playable throughout.
 
Net, hoop, and fencing checks. Hardware should be periodically inspected for loosening, rust, or wear, since a failing net post or unstable hoop anchor is a safety issue, not just a cosmetic one.
 

Resurfacing vs. Full Rebuild

 
Resurfacing only makes sense when the underlying base is structurally sound. If your court shows significant heaving, widespread structural cracking, or persistent drainage failure that basic slope correction can’t fix, a full rebuild is the more responsible long-term investment, even though it costs more upfront than resurfacing.
 

Why Regular Maintenance Pays Off

 
Courts that receive periodic maintenance and recoating on a proactive schedule consistently outlast courts that are left alone until problems become severe. Addressing small issues early, a crack here, a drainage tweak there, is dramatically less expensive than waiting for those issues to compound into base failure that requires a full rebuild.
 

FAQ

 
How often should a sport court be resurfaced?
Most acrylic courts benefit from a full recoat every four to seven years, depending on usage intensity and sun exposure.
 
What are the first signs that a court needs resurfacing?
Fading or chalking color, spreading cracks, inconsistent bounce, and faded line striping are the most common early signs.
 
Can cracks be repaired without a full resurfacing project?
Minor cracks can sometimes be treated individually, but if cracking is widespread, a full resurfacing project (which includes comprehensive crack repair) delivers better long-term results.
 
How do I know if my court needs resurfacing or a full rebuild?
The deciding factor is base condition. If the concrete or asphalt base is structurally sound with functioning drainage, resurfacing is usually sufficient.
 
Does resurfacing include new line striping?
Yes, our resurfacing service includes fresh, precise line striping as part of the standard scope.
 
What routine maintenance should I be doing between resurfacing projects?
Regular cleaning, prompt attention to small cracks, periodic drainage checks, and inspecting hardware like nets, hoops, and fencing for wear.
 
This page connects to our acrylic sports court surface guide and our tennis court resurfacing cost page. Ready to schedule an assessment? Get a quote from Legendary Sport Construction today.
 

Basketball Court Construction Cost: A Full Breakdown

Basketball Court Construction Cost: A Full Breakdown

Basketball Court Construction Cost: A Full Breakdown

One of the first questions every homeowner or property manager asks is simple: what does it actually cost to build a basketball court? The honest answer is that it depends on several variables, but they’re all knowable up front. This guide breaks down exactly where your money goes so you can budget accurately before requesting a quote from Legendary Sport Construction.
 

The Main Cost Factors

 
Court size. A half-court for casual backyard play costs significantly less than a full regulation court. Size is the single biggest driver of total price because it affects every downstream line item: base material, concrete or asphalt volume, surfacing gallons, and striping length.
 
Site conditions. A flat, accessible lot with stable soil and easy equipment access costs less to prepare than a sloped site, a lot with poor drainage, or a location requiring extensive excavation, retaining work, or tree/obstacle removal.
 
Base type. Concrete bases cost more upfront than asphalt but last longer and require less long-term maintenance. Asphalt is a lower initial-cost option that still performs well when installed correctly, though it typically needs resurfacing sooner.
 
Surface system. Standard acrylic color coating is the most cost-effective way to get a professional playing surface. Cushioned acrylic systems and premium modular tile systems cost more per square foot but add shock absorption or installation flexibility.
 
Accessories. In-ground adjustable hoop systems cost more than fixed-height systems. Add court lighting, fencing, windscreens, or shade structures, and the total moves up accordingly.
 
Access and logistics. Sites that require equipment to be brought in through tight spaces, over existing landscaping, or long distances from the street add labor cost.
 

Typical Cost Ranges

 
While every project gets a custom quote after a site visit, here’s how the major components generally break down:
 
  • Base preparation and paving (concrete or asphalt): This is usually the largest line item, driven by court size and site prep needs.
  • Acrylic surfacing system: Multiple coats (resurfacer, color coats, line striping) priced per square foot, with cushioned systems costing more than standard.
  • Hoop systems: Fixed-height systems are the most economical; in-ground adjustable systems with breakaway rims cost more.
  • Lighting: LED court lighting packages vary widely based on the number of fixtures and pole-mounted vs. wall-mounted setups.
  • Fencing and extras: Perimeter fencing, windscreens, benches, and shade structures are typically quoted separately.
 
Because soil conditions and site access vary so much across Las Vegas and Phoenix properties, we don’t publish a flat per-square-foot number that would be misleading for most sites. Instead, every project gets an itemized quote after we walk the property.
 

Where Homeowners Overspend (or Underspend)

 
The most common budget mistake isn’t overspending on the surface, it’s underspending on the base. A cheaper base that isn’t compacted or sloped correctly leads to cracking and standing water within a few years, which then requires costly repair or a full redo. Spending appropriately on excavation and base work up front is the single best way to protect your investment and avoid paying for the same court twice.
 
On the other end, some property owners over-invest in premium surface systems for a court that will see light, casual use, when a well-installed standard acrylic system would perform just as well for a fraction of the cost.
 

How to Get an Accurate Quote

 
Because so many variables affect final pricing, the fastest way to get real numbers is a site visit. Legendary Sport Construction evaluates your space, discusses your goals and budget, and provides an itemized proposal that breaks down base work, surfacing, and accessories separately, so you know exactly what you’re paying for and why.
 

FAQ

 
What is the average cost to build a basketball court?
Costs vary widely based on size, site conditions, base type, and surface system. We provide detailed, itemized quotes specific to your property rather than a generic average that may not apply to your situation.
 
Is asphalt or concrete cheaper for a basketball court base?
Asphalt generally has a lower upfront cost, while concrete costs more initially but lasts longer with less frequent resurfacing.
 
Does court size significantly affect the price?
Yes, size is the biggest single driver of cost since it scales base material, surfacing, and striping requirements.
 
What adds the most unexpected cost to a basketball court project?
Site conditions such as poor drainage, sloped terrain, or difficult equipment access are the most common source of costs that exceed initial expectations.
 
Should I choose a cheaper surface system to save money?
Not if it compromises the base. Cutting corners on excavation and base prep to afford a nicer coating almost always costs more in repairs later. We recommend prioritizing the base first.
 
How can I get an accurate price for my property?
Request a site visit and quote from our team. We’ll assess your specific site conditions and give you an itemized breakdown before any work begins.
 
This page is part of our Basketball Court Construction hub. See our full guide on basketball court installation and outdoor surface options, or contact your local service-area page. Ready for real numbers? Get a quote from Legendary Sport Construction today.
 

Outdoor Basketball Court Surface Options: A Complete Comparison

outdoor basketball court surface options

Outdoor Basketball Court Surface Options: A Complete Comparison

The surface system you choose for an outdoor basketball court affects everything from how the ball bounces to how long the court lasts before it needs major work. This guide walks through the main surface materials available for outdoor courts in Las Vegas and Phoenix, so you can choose the right one for your budget, usage, and site.
 

Acrylic Surfacing Systems

 
Acrylic is the most common surface for outdoor basketball courts, and for good reason. It’s applied as a multi-coat system directly over a properly prepared concrete or asphalt base:
 
  • Resurfacer coat — fills minor surface imperfections and hairline cracks, creating a uniform texture.
  • Color coats — typically two or more coats, applied in your chosen colors, giving the court its final look and playing texture.
  • Line striping — court lines and any logos or graphics painted with durable, UV-stable paint.
 
Acrylic systems are prized for their consistent ball bounce, textured non-slip surface, and nearly unlimited color and design options, including two-tone key areas, logos, and multi-sport line overlays. They are also the most economical way to achieve a professional, tournament-grade look.
 
The tradeoff: acrylic coatings sit on top of the base, so the base still has to be well-built. A great acrylic job over a poorly compacted base will still crack.
 

Cushioned Acrylic Systems

 
Cushioned (or “cushioned game court”) systems add a rubberized underlayment beneath the standard acrylic color coats. This layer absorbs impact, reducing stress on players’ joints during extended play, and it also helps bridge minor surface irregularities. Cushioned systems cost more than standard acrylic but are a smart upgrade for courts used for daily training, camps, or by younger players where impact reduction matters.
 

Modular Tile Systems

 
Modular sports tiles are interlocking polypropylene tiles that snap together over an existing hard surface, such as a driveway or existing concrete pad. Key advantages:
 
  • Fast installation with minimal curing time compared to poured surfacing systems.
  • Built-in drainage through perforated tile design, which helps in areas prone to standing water.
  • Flexibility — tiles can, in some cases, be removed and reinstalled elsewhere.
  • Forgiving over imperfect surfaces, since the tile system floats above minor unevenness.
 
The tradeoff: tile seams and edges require quality installation to avoid lifting, and the aesthetic is different from a smooth acrylic finish, some homeowners prefer one look over the other.
 

Which Surface Should You Choose?

 
Choose acrylic if you want the closest experience to a professional or tournament court, maximum color/design customization, and you’re building on a new or well-prepared concrete/asphalt pad.
 
Choose cushioned acrylic if the court will see heavy daily use or you want extra joint protection for younger or competitive players.
 
Choose modular tile if you want faster installation, need to work around drainage challenges, or are installing over an existing surface without extensive base rework.
 

Climate Considerations for Las Vegas and Phoenix

 
Outdoor courts in our region face extreme summer surface temperatures and intense, sustained UV exposure. Not every “outdoor-rated” coating on the market is actually formulated to hold color and texture under those conditions. We use acrylic systems specifically engineered for high-heat, high-UV climates, which is a major reason our courts don’t chalk, fade, or crack prematurely the way lower-grade coatings often do within a season or two.
 

FAQ

 
What’s the most durable surface for an outdoor basketball court?
A properly installed acrylic system over a well-built base is the most durable and cost-effective option for most outdoor courts. Cushioned acrylic adds even more longevity for high-use courts by reducing surface stress.
 
Can modular tile be installed over an old, cracked driveway?
In some cases yes, since tile systems are more forgiving of minor surface imperfections than poured coatings, but significant cracking or heaving still needs to be addressed first.
 
Does surface color affect court temperature or durability?
Lighter colors reflect more heat and stay cooler underfoot, which can matter in extreme summer heat. All colors in a quality acrylic system are UV-stable, but lighter palettes are often preferred for comfort in desert climates.
 
How long does acrylic surfacing last before it needs to be redone?
A well-installed acrylic system typically lasts four to seven years before a recoat is needed, depending on sun exposure and usage.
 
Is modular tile a good option for a multi-sport court?
Yes, tile systems handle striping for multiple sports well and their drainage properties make them a strong choice for courts that need to handle varied use.
 
This page is part of our Basketball Court Construction hub. Learn more about basketball court installation and typical construction costs, and check the service-area page for your city. Ready to choose your surface? Get a quote from Legendary Sport Construction today.
 

GET A QUOTE

Please Provide Your Contact Information and Project Details